Jupyter Notebook Support
Jupyter is a popular free, open-source, web-based interactive development environment that allows users to create notebooks for documenting computational workflow. A notebook consists of an ordered series of input and output cells for the organization of code, explanatory text, and multimedia in a single document. The chronological, narrative record-keeping a notebook allows for are useful for analysis, reporting, teaching, documentation, and many other purposes.
The code in a notebook cell is passed to a programming language specific “kernel” on the backend that does the code execution. EViews, starting with version 13, can be used as a Jupyter kernel. Users can run an EViews program and display its results from within a notebook.
Using the EViews Jupyter Kernel
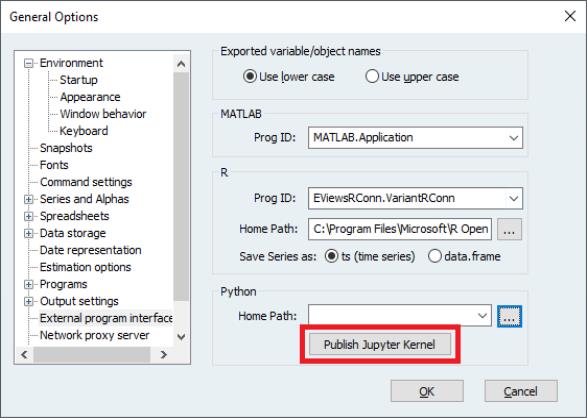
After Python and Jupyter have been installed (https://jupyter.org/), make the EViews kernel available to Jupyter by going to the main EViews menu and selecting . Click the button.
A new EViews-specific folder will be created in the Jupyter kernels folder location, usually found at “%AppData%/Roaming/jupyter/kernels”.
Next, run the notebook server. Depending on your installation, this can be done from a command prompt or the start menu in Windows or from Anaconda Navigator. Select the EViews kernel by choosing it from the “New” drop-down menu in the upper-right corner of the notebook dashboard. This will open the notebook editor, the interface where code and other input is entered and evaluated. Type EViews commands into the cells and run them with shift-enter (to run the current cell and select the following cell) or ctrl-enter (to run the current cell). More information on using Jupyter can be found in the Jupyter documentation (
https://jupyter-notebook.readthedocs.io/en/stable/notebook.html).