Basic Object Operations
Creating Objects
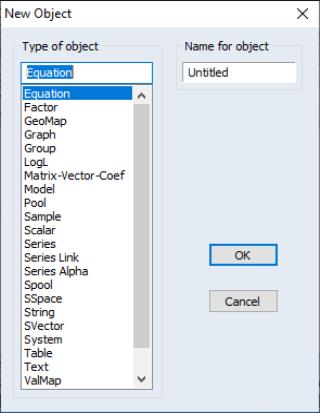
To create an object, you must first make certain that you have an open workfile container and that its window is active. Next, select from the main menu. Until you have created or loaded a workfile, this selection is unavailable. After you click on the menu entry, you will see the dialog box.
You can click on the type of object you want, optionally provide a name for the object, and then click on OK. For some object types, a second dialog box will open prompting you to describe your object in more detail. For most objects, however, the object window will open immediately.
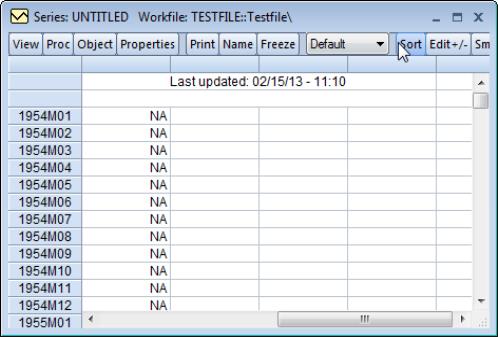
For example, if you select , you will see a dialog box prompting you for additional information. Alternatively, if you click on Series and then select OK, you will see an object window (series window) displaying the spreadsheet view of an UNTITLED series.
We will discuss object windows in greater detail in
“The Object Window”.
Objects can also be created by applying procedures to other objects or by freezing an object view (see
“Freezing Objects”).
Selecting Objects
Creating a new object will not always be necessary. Instead, you may want to work with an existing object. One of the fundamental operations in EViews is selecting one or more objects from the workfile directory.
The easiest way to select objects is to point-and-click, using the standard Windows conventions for selecting contiguous or multiple items if necessary. Keep in mind that if you are selecting a large number of items, you may find it useful to use the display filter before beginning to select items.
In addition, the button in the workfile toolbar provides convenient selection shortcuts:
• selects all of the objects in the workfile with the exception of the C coefficient vector and the RESID series.
• eliminates any existing selections.
Note that all of the selected objects will be highlighted.
Opening Objects
Once you have selected your object or objects, you will want to open your selection, or create a new object containing the selected objects. You can do so by double clicking anywhere in the highlighted area.
If you double click on a single selected object, you will open an object window.
If you select multiple graphs or series and double click, a pop-up menu appears, giving you the option of creating and opening new objects (group, equation, VAR, graph) or displaying each of the selected objects in its own window.
(You may also select or right-mouse click and select to access menus for opening the multiple objects.)
Note that if you select multiple graphs and double click or select , all of the graphs will be merged into a single graph and displayed in a single window.
Other multiple item selections are not valid, and will either issue an error or will simply not respond when you double click.
When you open an object, EViews will display the current view. In general, the current view of an object is the view that was displayed the last time the object was opened (if an object has never been opened, EViews will use a default view). The exception to this general rule is for those views that require significant computational time. In this latter case, the current view will revert to the default.
Showing Objects
An alternative method of selecting and opening objects is to “show” the item. Click on the button on the toolbar, or select from the menu and type in the object name or names.
Showing an object works exactly as if you first selected the object or objects, and then opened your selection. If you enter a single object name in the dialog box, EViews will open the object as if you double clicked on the object name. If you enter multiple names, EViews will always open a single window to display results, creating a new object if necessary.
The button can also be used to display functions of series, also known as auto-series. All of the rules for auto-series that are outlined in
“Database Auto-Series” will apply.
Previewing Objects
EViews offers a preview tool for those times when you wish to quickly look through a number of objects. Instead of opening and closing each object, you may use the preview to quickly scroll through a preview of each object, viewing metadata (name, type, description, frequency, last update, source, units, etc.) and object type-specific information (for example, series will show observation data and a small graph while equations will show estimation output).
To preview an object you simply select the object in the workfile (or database), and, if necessary, open the preview window. The preview window will display a preview of the contents of the first selected object.
If the preview window is not open you may:
• Press the F9 key.
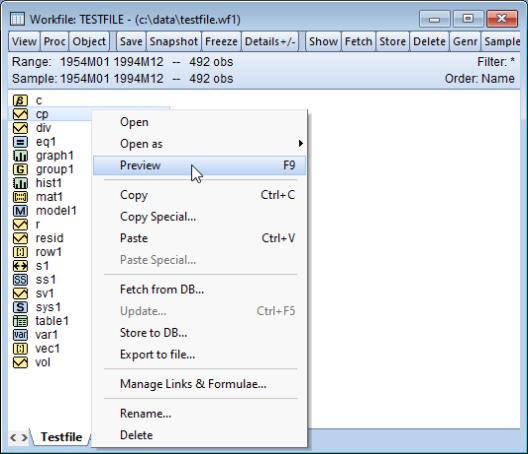
• Right-click on an object and select or (the latter is only be available for previewing group objects in a workfile).
• Select from the main menu.
Alternately, to preview an object in a database you can simply double-click on the object in the database window to display the contents of the object in a preview window. (Note that previewing objects from hosted databases may involve a slight delay as the data are retrieved.)
Once opened, you may move the preview window anywhere on your screen, even outside of the EViews application window. A subsequent press of the F9 key will activate and bring to the front the preview window (if it is active) or close the preview window (if the window is active).
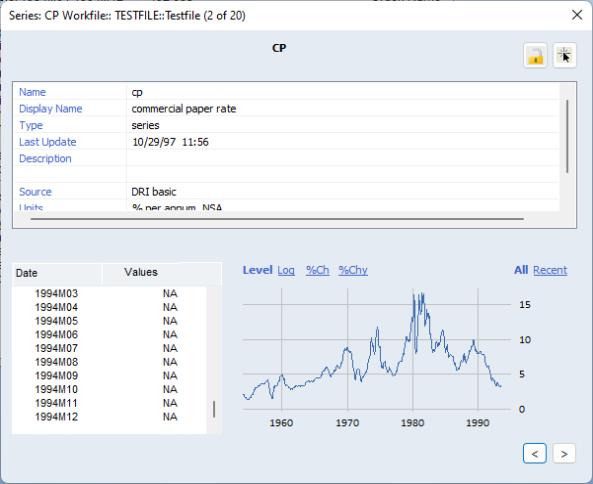
The title bar of the preview window shows the type, name and location of the object, and the number of objects in the current preview list (either the workfile or database, or the currently selected subset of objects).
For example, here, we see a series preview window for the series CP which is located in the workfile “Testfile.WF1”. CP is the second (alphabetically) of the 20 objects in this workfile.
The top part of the display area shows the name of the object and possibly a description, along with metafile information taken from the label view of the object.
The remaining contents of the window will differ depending on the selected object.
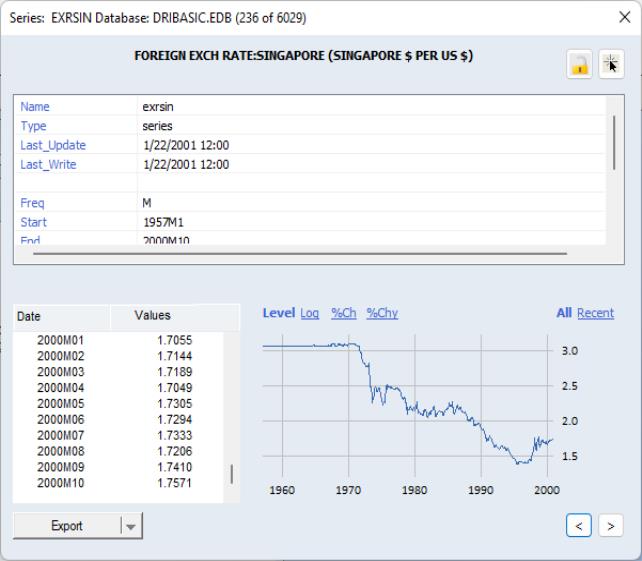
For the series object depicted here, the bottom area shows a spreadsheet of the values in the series and a graph of the values in the series. Notice that you can interact with the graph: change the display to show the levels of the series, or simple log, percentage change, and year percentage change transforms of the data; click on to change the graph to only show recent values of the series or all to show of the values in the series.
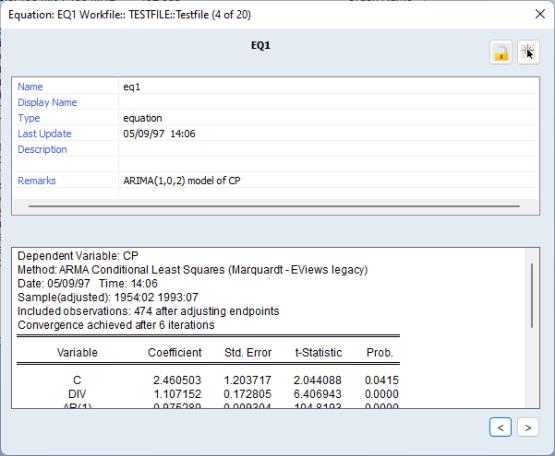
Alternately, the preview window for an equation as seen here displays the estimation output in the bottom portion of the window.
Working with the Preview Window
To the right of the name or description at the top of the preview area are two icons:
• Lock: prevent the contents of the preview window from changing, even if you select a different object. The preview window will remain locked until the lock button is pressed again, therefore unlocking it.
• Find: bring the workfile or database window containing the object to forefront, and if possible, select the object.
On the bottom right of the window, you will find two navigation buttons that facilitate easy browsing through objects:
• >: navigate (forward) to the next object in the preview list, cycling around to the first object if necessary.
• <: navigate (backward) to the previous object in the preview list, cycling around to the last object if necessary.
If you select a single object, the list of objects to browse contains all of the objects in the active database or workfile. Alternately, you can browse through a subset of objects simply by selecting the objects of interest.
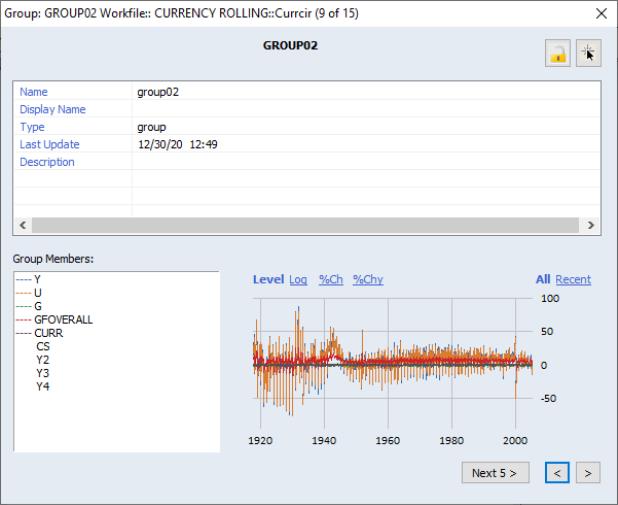
For group objects there is are additional navigation button in the lower right corner of the preview window alongside the > and < buttons:
• Next 5>: navigate forward to the next five members of the group, cycling around to the first object if necessary.
Note that the group preview lists all the members of a group under the Group Members subwindow, but displays the line graphs of only five group members at a time. The members displayed have colored line symbols before their names. If you click on a group member in the list, the selection and graph will change. This member will be the first of the five objects previewed in the graph.
For database objects, in the lower left corner of the preview window will contain an button.
Pressing the button fetches the object shown in the preview window from the database into the active workfile. If there is no open workfile, the object will be exported to a new untitled workfile.
Clicking on the down arrow on the right side of the button shows two options: and
• will simply fetch the object into the current workfile as described above.
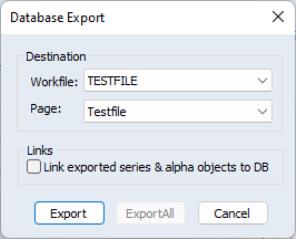
• will display a dialog offering various options for the fetch operation.
You can control the workfile and page destination, whether to export series and alpha objects as links or by (the default) copying of current values. Clicking on exports only the currently displayed object. Clicking on exports all selected objects.
