Foreign Format Databases
While most of your work with databases will probably involve using EViews native format databases, EViews also gives you the ability to access data stored in a variety of other formats using the same database interface. You can perform queries, copy objects to and from workfiles and other databases, rename and delete objects within the database, add databases to your search path, and use EViews’ name aliasing features, all without worrying about how the data are stored.
When copying objects, EViews preserves not only the data itself, but as much as possible of any date information and documentation associated with the object. Missing values are translated automatically.
To Convert Or Not To Convert?
Although EViews allows you to work with foreign files in their native format, in some cases you may be better off translating the entire foreign file into EViews format. If necessary, you can then translate the entire file back again when your work is complete. EViews native databases have been designed to support a certain set of operations efficiently, and while access to foreign formats has been kept as fast as possible, in some cases there will be substantial differences in performance depending on the format in use.
One significant difference is the time taken to search for objects using keywords in the description field. If the data are in EViews format, EViews can typically query databases containing tens of thousands of series in a couple of seconds. When working with other formats, you may find that this same operation takes much longer, with the time increasing substantially as the database grows.
On the other hand, keeping the data in the foreign format may allow you to move between a number of applications without having to retranslate the file. This minimizes the number of copies of the data you have available, which may make the data easier to update and maintain.
Using EViews, you can either translate your data or work with your data directly in the foreign format. You should choose between the two based on your particular needs.
Opening a Foreign Database
Working with foreign formats requires very little additional knowledge. To open a foreign database, simply select from the main menu to open the dialog. In the field Database/File Type: select the type of the foreign database or file you wish to open. If the database is a local file, you can then use the Browse Files button to locate the database in exactly the same way as for a native EViews database. You can create a new foreign format database by a similar procedure way using File/New/Database... from the main EViews menu.
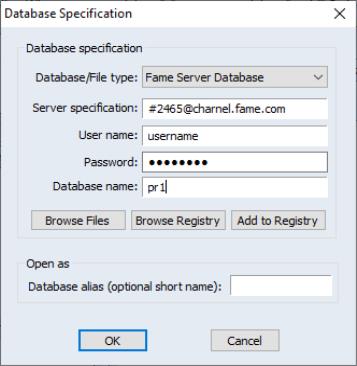
If the database is accessed through a client-server model, selecting the dialog will change to show extra fields necessary for making the connection to the server. For example, when accessing a database located on a FAME server, the dialog will include fields for the FAME server, username and password.
Since access to a server requires many fields to be entered, you may wish to save this information as an entry in the database registry (see
“The Database Registry” for details).
You can also create and open foreign format files using the
dbopen or
dbcreate commands. You may either use an option to specify the foreign type explicitly, or let EViews determine the type using the file extension. See
dbopen and
dbcreate for details.
Copying a Foreign Database
Once you have opened a window to a foreign database, you can copy the entire database into a new format using from the database menus. A dialog will appear which allows you to specify the type and other attributes of the new database you would like to create.
When performing a database copy to a new format, objects which cannot be copied due to incompatibility between formats will result in error messages in the EViews command window but will not halt the copying process. Upon completion, a message in the status line reports how many objects could not be copied.
Notes on Particular Formats
Bloomberg
EViews allows you to use the standard EViews database interface to search, browse, and retrieve Bloomberg Reference Data Services extensive library market and economic data.
You can search through Bloomberg securities and fields from within EViews to quickly locate the data you need, then fetch the data directly into an EViews workfile without the need for intermediate files or formats.
The Bloomberg database interface is not available in EViews Standard Edition.
Additionally, you must have:
1. The Bloomberg Professional application software installed on your machine
2. A currently active subscription to Bloomberg and be able to log into the Bloomberg Professional terminal on your machine.
Note that the highest resolution of data that can be fetched by EViews is one minute interval data. EViews does not currently support reading tick data for a security. Further, the Bloomberg database extension for EViews that powers the connection only supports Bloomberg Desktop API configurations (Bloomberg Server API and B-Pipe configurations are not supported).
For detail on Bloomberg Reference Data Services please see the Bloomberg website
http://www.bloomberg.com/enterprise/data/reference-data-services.
The following discussion offers a quick introduction to use EViews to connect with Bloomberg data. See our whitepaper:
Bloomberg Database Extension for EViews (available from our website
www.eviews.com/download/download.html) for additional detail and discussion.
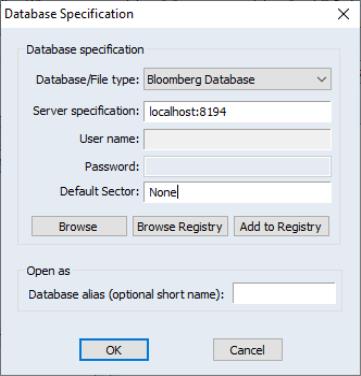
To start, you must open a database window to Bloomberg by selecting from the main EViews menus, then selecting from the dropdown menu. The following dialog should appear:
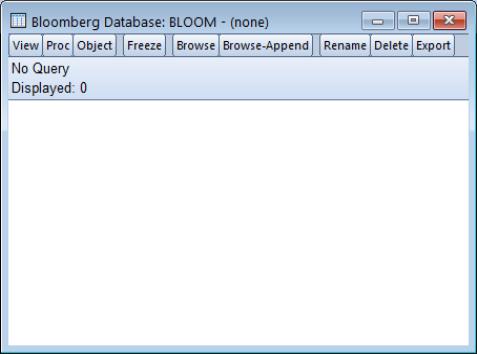
In most cases, you should simply be able to click on to get started. Clicking on should bring up a Bloomberg database window.
The database window represents a connection to Bloomberg data.
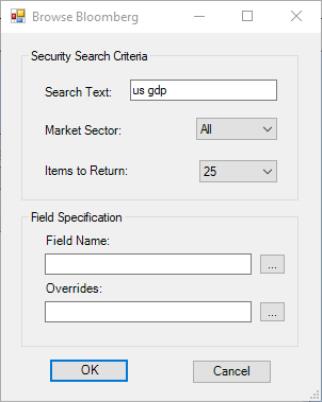
The first step in retrieving data is to find a series that we would like to fetch. Click on to bring up the Bloomberg database custom search dialog:
• The field allows you to enter one or more keywords to search for. The ‘Market Sector’ field lets you restrict the search to a particular Bloomberg market sector. (If you are using a Bloomberg keyboard you can change the market sector field by pressing a Yellow Key).
• The field specifies how many items to return from the search. Bloomberg is very effective at selecting relevant results so only a small number of results is generally needed.
• The and boxes allow you to specify what particular information about a security you would like to fetch. By default EViews will fetch the field “PX_LAST” without any overrides.
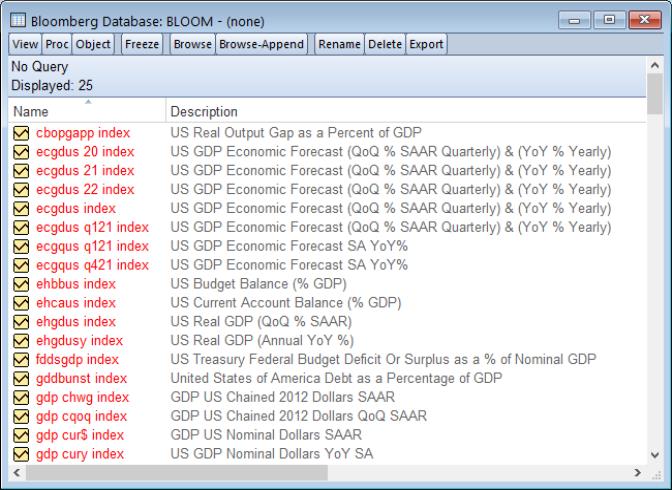
For example, we can simply type “us gdp” into the box and press . You should return to the database window with the following search results displayed:
Any series displayed in the database may be manipulated following the usual EViews interface conventions:
• Double click on a series to bring up detailed information on the series
• Drag and drop series or copy and paste them into an EViews workfile or database to fetch the current data from the server (drag with the right mouse button or use Paste Special to create links)
Limitations
Note that the highest resolution of data that can be fetched by EViews is one minute interval data. EViews does not currently support reading tick data for a security.
Further, the Bloomberg database extension for EViews that powers the connection only supports Bloomberg Desktop API configurations (Bloomberg Server API and B-Pipe configurations are not supported).
Bureau of Economic Analysis (BEA)
BEA provides access to a list of datasets that offer a large range of publicly available data, including U.S. GDP, foreign trade, investment statistics, and industry data.
Please note that an internet connection is required to obtain BEA online data. For more information on the datasets, please see
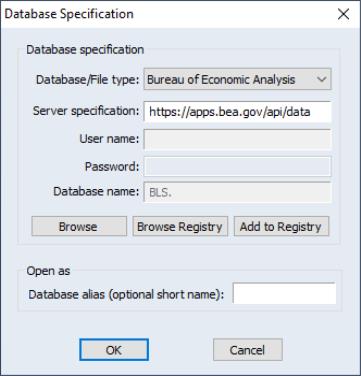
EViews offers a custom interface to BEA data. To open the BEA database, select from the main EViews menu, then select from the dropdown menu:
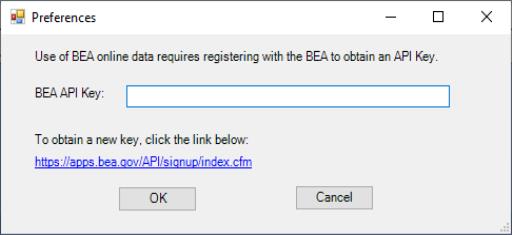
Use of the BEA service is free but requires registration. The first time you attempt to open the database you will be asked to enter an API Key obtained from the Bureau of Economic Analysis:
Please enter your API key and then click on . The key will be saved as a user specific setting in your EViews “.ini” file. If you need to change the key at a later time, select from the EViews database menu to modify your settings.
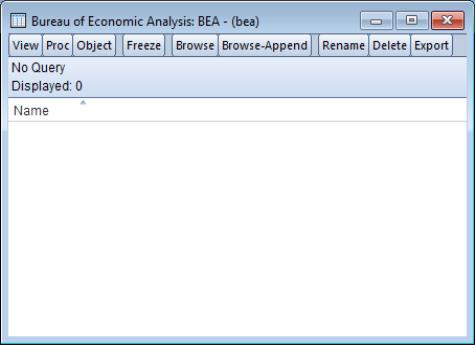
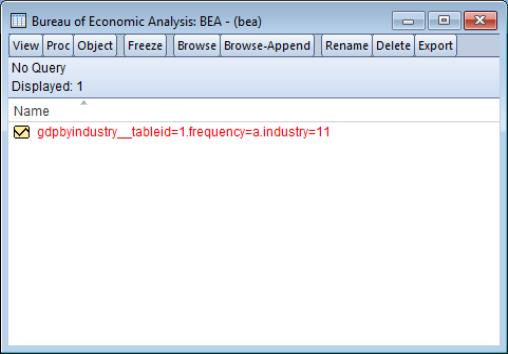
When you click on , EViews will open a standard database window:
Click on to open the custom BEA window:
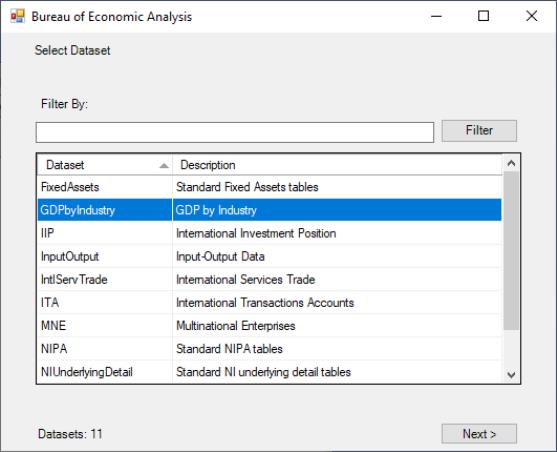
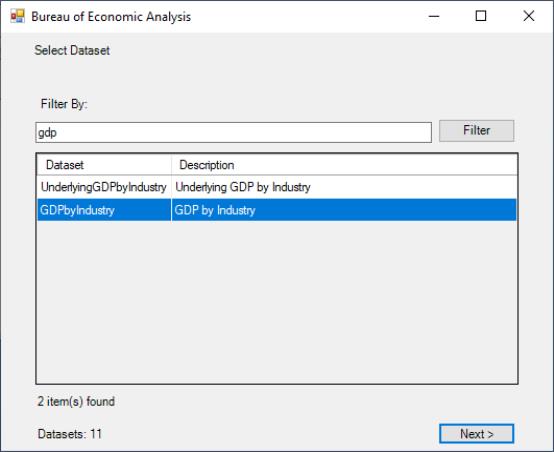
The dialog allows you to select data available within datasets. The browser interface to the data provides a way to search through the datasets by typing a keyword in the textbox and clicking the button:
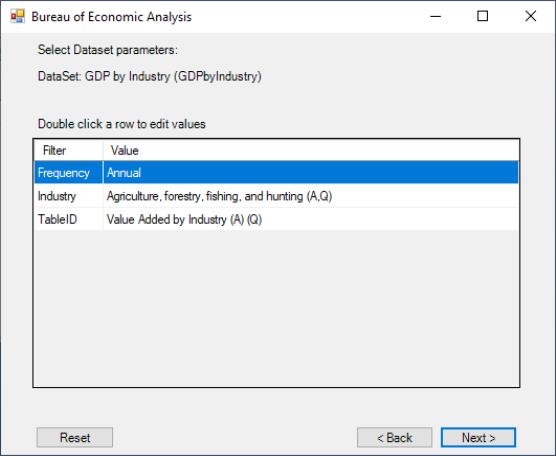
Select a dataset and click the button. A dialog with a list of dataset parameters will be shown, which will allow you to filter and customize the search results of the available series objects in the selected dataset. The default parameters are displayed under the column of the data table. Double click the row the change the default values.
Click the button to clear the selections, the button to navigate to the previous window, or the button to view the available series:
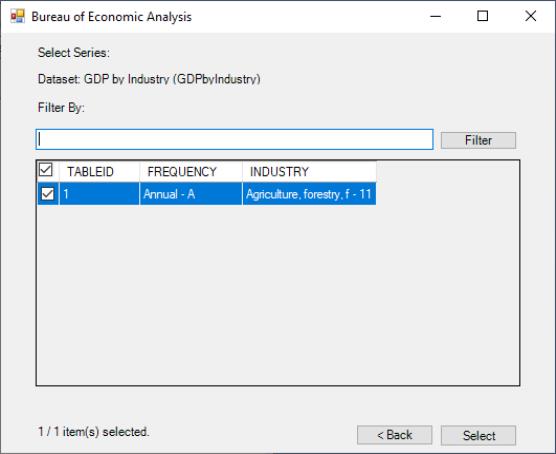
A dialog containing a table with all the available series is displayed. The interface provides a way to search through the series by typing a keyword in the textbox and clicking the button. Click the button to select the series:
Once you have found the series of interest, you may drag-and-drop (or copy-and-paste) the series directly into an EViews workfile in the usual fashion.
Bureau of Labor Statistics (BLS)
The BLS database is a large collection of free and publicly available economic data provided by the Bureau of Labor Statistics of the U.S. Department of Labor.
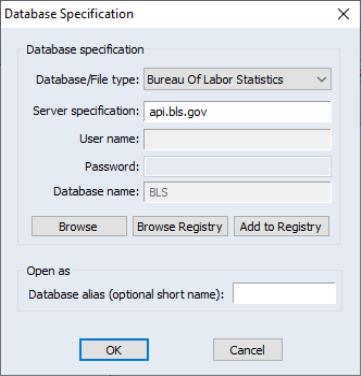
EViews 10 offers a custom interface to BLS data. To open the BLS database, select from the main EViews menu, then select from the dropdown menu:
The server specification will be automatically filled in with the BLS server address api.bls.gov, which you should not need change. Click on to proceed.
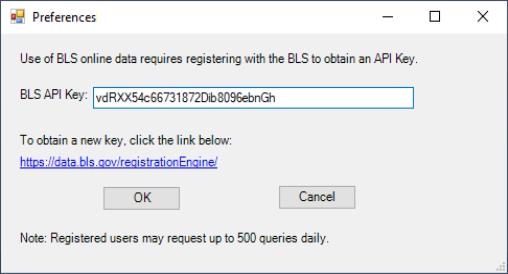
Use of the BLS service is free but requires registration. The first time you attempt to open the database you will be asked to enter an API Key obtained from the Bureau of Labor Statistics:
Please enter your API key and then click on OK. The key will be saved as a user specific setting in your EViews ".ini" file. If you need to change the key at a later time, select from the EViews database menu to modify your settings.
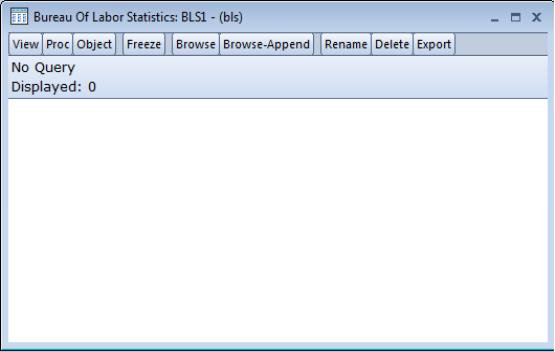
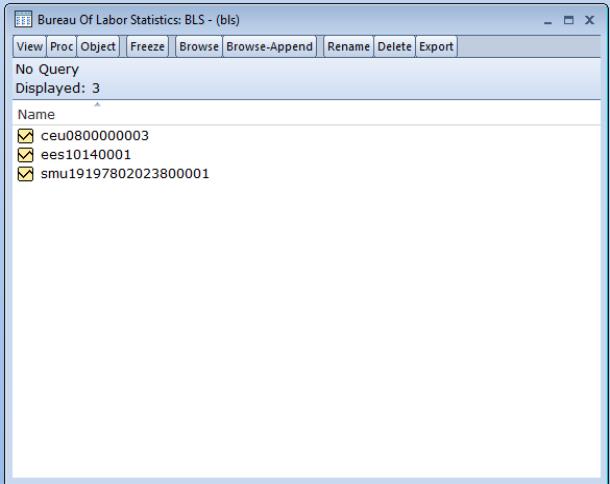
When you click on , EViews will open a standard database window:
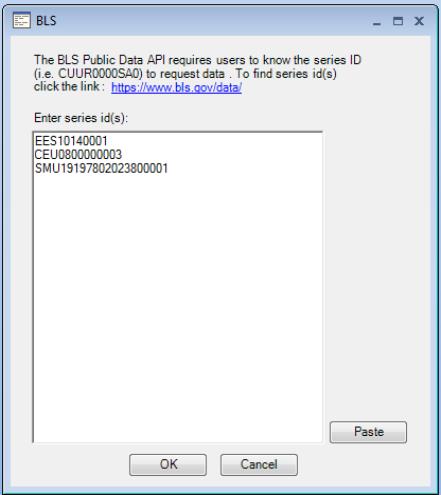
Click on to open the custom BLS window. The standard database window will be minimized and the BLS window will open:
The browser window displays an edit box where the user can type or one or more series IDs to be retrieved from BLS. In the example above the edit box contains three typed series. After clicking , the regular EViews database window will be restored and will contain any requested series.
Please note that the BLS Data API requires users to know the series ID to request data.
Once you have found the series of interest, you may drag-and-drop (or copy-and-paste) the series directly into an EViews workfile.
CEIC
The CEIC database includes economic, sector and financial data. Data are fetched from the internet by Internet Securities, Inc. (also known as IS Emerging Markets) XML based data servers.
The CEIC database interface is not available in EViews Standard Edition.
To access CEIC data, the CEIC-EViews Interface Software must already be installed on the client machine. To obtain the software and a valid CEIC account, please contact Internet Securities, Inc. directly. For additional information, please see
http://www.securities.com.
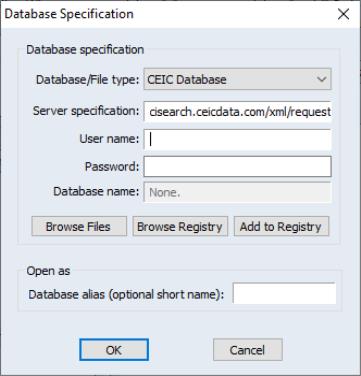
To access a CEIC database, select and select in the drop-down menu and fill out your and as prompted. The Sever specification is pre-filled with the CEIC default, but you may enter the specification information for a different server if desired:
You may optionally provide a . Click on to open the database in the standard EViews interface.
Census (United States Census Bureau)
The Census Bureau provides access to a list of datasets that offer a large range of publicly available data about the people and economy of the United States. Please note that an internet connection will be required to obtain Census online data. For more information on the datasets, please see
https://api.census.gov/data.html
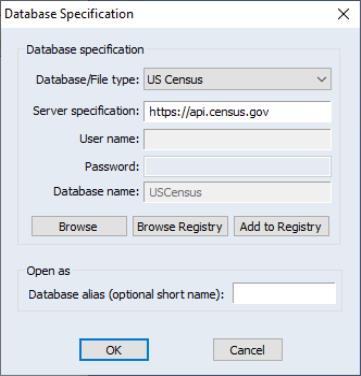
EViews offers a custom interface to the Census data. To open the Census database, select from the main EViews menu, then select from the dropdown menu:
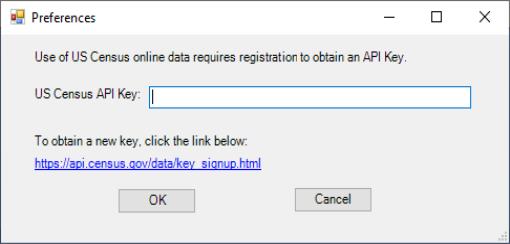
Use of the Census service is free but requires registration. The first time you attempt to open the database you will be asked to enter an API Key obtained from the United States Census Bureau:
Please enter your API key and then click on . The key will be saved as a user specific setting in your EViews “.ini” file. If you need to change the key at a later time, select from the EViews database menu to modify your settings.
When you click on , EViews will open a standard database window:
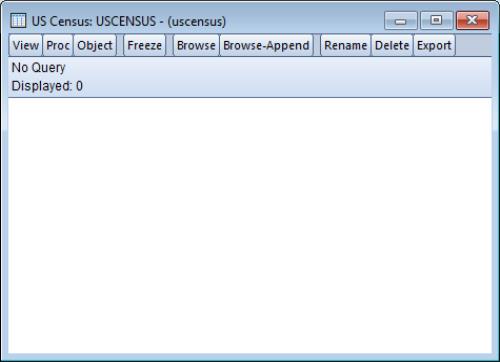
Click on to open the custom Census window:
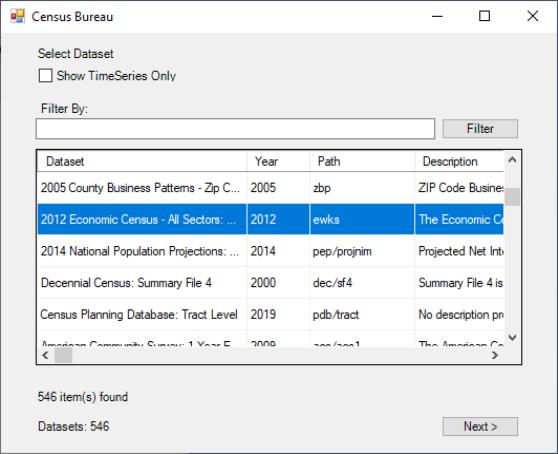
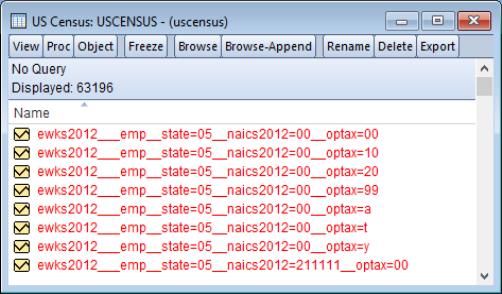
The dialog displays the available datasets. The checkbox is checked by default. Uncheck the box if you want to see all available datasets. The browser interface to the datasets provides a way to search through the datasets by typing a keyword in the textbox and clicking the button. Select a dataset and click the button. A dialog with a list of variables will be shown, which will allow you to filter and customize the search results of the available series objects in the selected dataset:
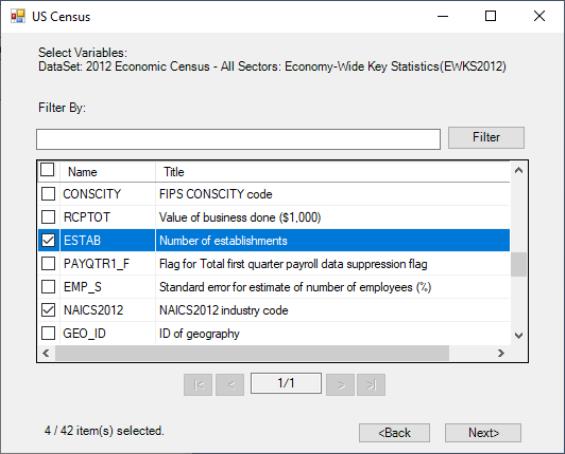
The variables that are preselected are required variables for the search; you may select additional variables you are interested in. You can search through the variables by typing a keyword in the textbox and clicking the button. Click the button to navigate to the next dialog:
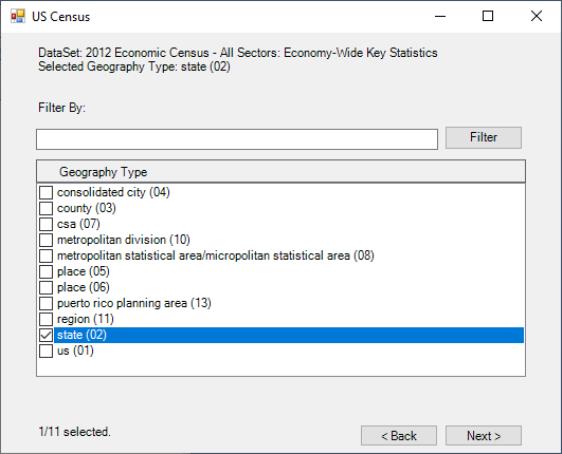
The majority of Census datasets require the user to specify geographic information in order to customize and limit the data result. After selecting the geography type, click to navigate to the next dialog. You might need to navigate to a number of dialogs until the geographic order is met:
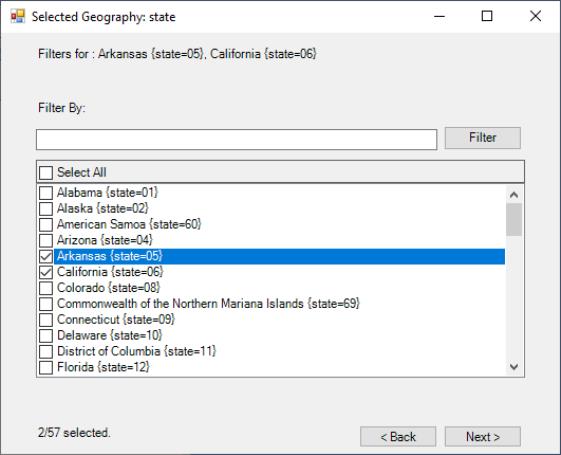
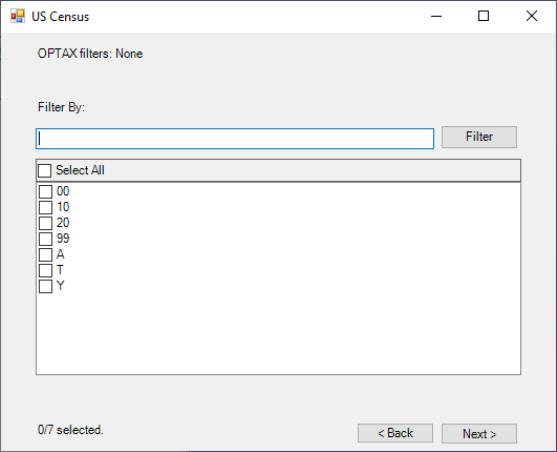
Select one or more geography options and navigate to the next dialog. If there are any variables required by the dataset you will be asked to choose available values:
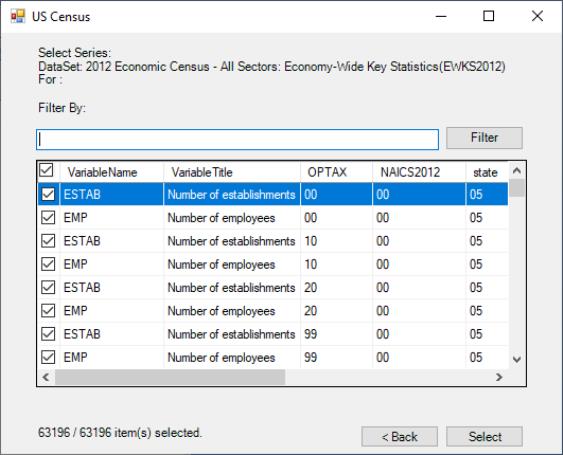
Once you finish selecting geography and required variables information, a dialog that contains a table with all the available series is displayed. The interface provides a way to search through the series by typing a keyword in the textbox and clicking the button.
Click the button to select the series:
Once you have found the series of interest, you may drag-and-drop (or copy-and-paste) the series directly into an EViews workfile in the usual fashion.
Datastream
The Datastream database allows you to fetch data remotely over the internet from Datastream's extensive collection of financial and economic data. Data are retrieved from the Thomson Financial Datastream historical XML API. The location of the XML API must be entered in the server specification of the open database dialog window.
The Datastream database interface is not available in EViews Standard Edition.
In addition, you must be able to access to the Thomson Datafeeds service using Datastream Advance through an internet connection, and you must have a valid XML API account from Thomson Financial. (Note that the XML API user name is not the Datastream user name as used with thick client products such as Datastream Advance.)
Please contact Thomson Reuters for further information (
http://www.thomsonreuters.com).
DBnomics
DBnomics provides access to a large range of publicly available economic data from national and international institutions like the IMF, Eurostat, World Bank, ECB, etc. Please note that an internet connection will be required to obtain DBnomics online data. For more information on the datasets, please see
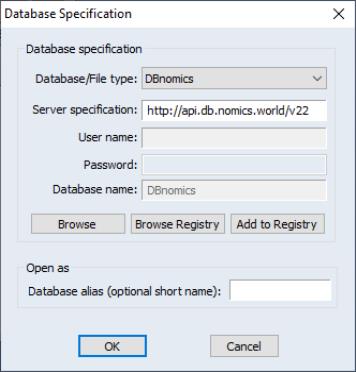
http://db.nomics.world.EViews offers a custom interface to the DBnomics data. To open the DBnomics database, select from the main EViews menu, then select DBnomics from the dropdown menu:
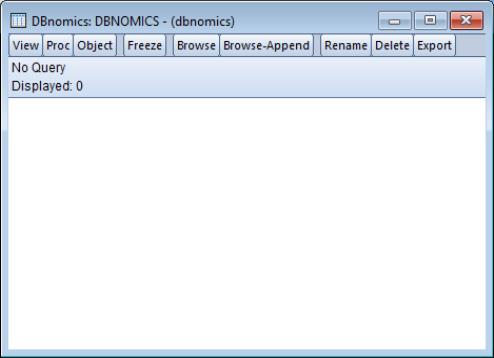
When you click on , EViews will open a standard database window:
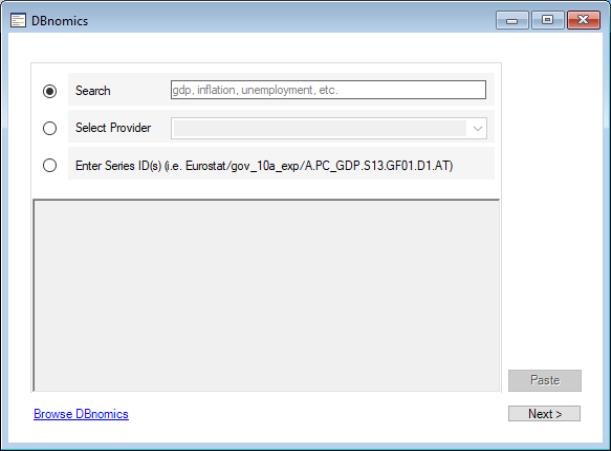
Click on to open the custom DBnomics window:
The dialog interface allows you to continue your search for data by searching for a keyword, by selecting a provider, or by typing known series ids.
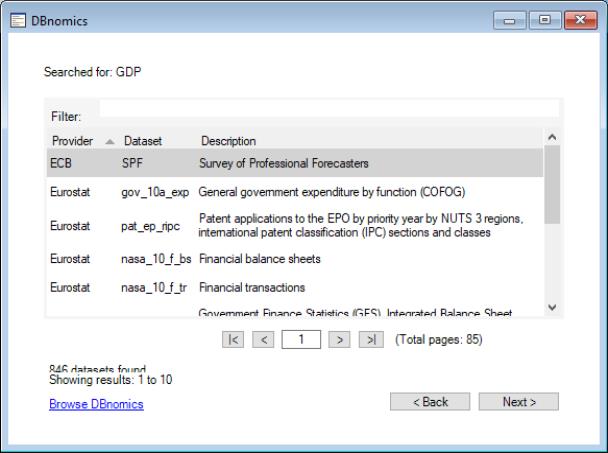
There are three methods to find the data you want. To search directly, click the radio button and type a keyword in the textbox. Use the button to view the results of the search:
A dialog that contains a table with all providers and datasets related to the keyword searched (GDP in this case) is displayed. The interface provides a way to filter through the results by typing a keyword in the textbox. It also provides a textbox and buttons to navigate through pages of results. Click the button or double-click on a row to select a provider and a dataset.
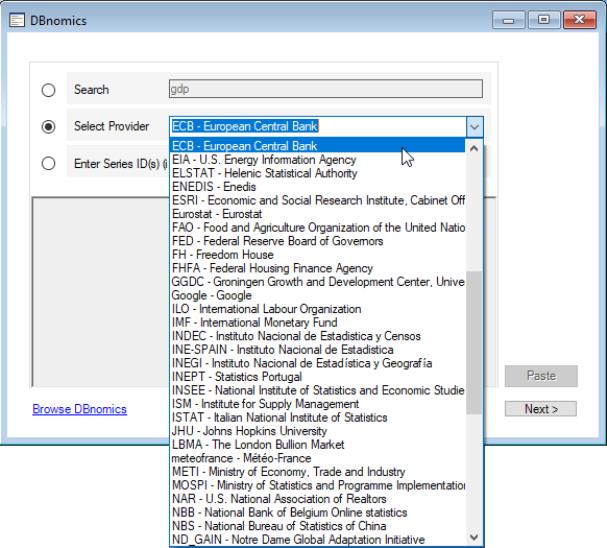
To select by data provider, click the radio button and choose one of the entries listed in the drop-down box:
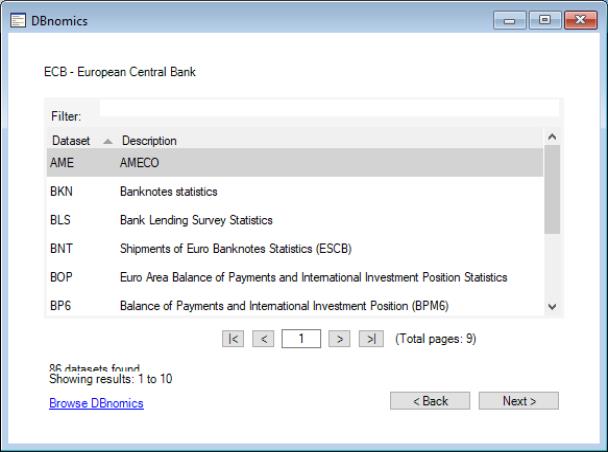
Use the button to view the results in a dialog that contains a table with all datasets related to the specified provider (in this case, ECB).
The interface provides a way to filter through the results by typing a keyword in the textbox. You may use the textbox and buttons to navigate through multiple pages of results. Click the button or double-click on a row to select a dataset.
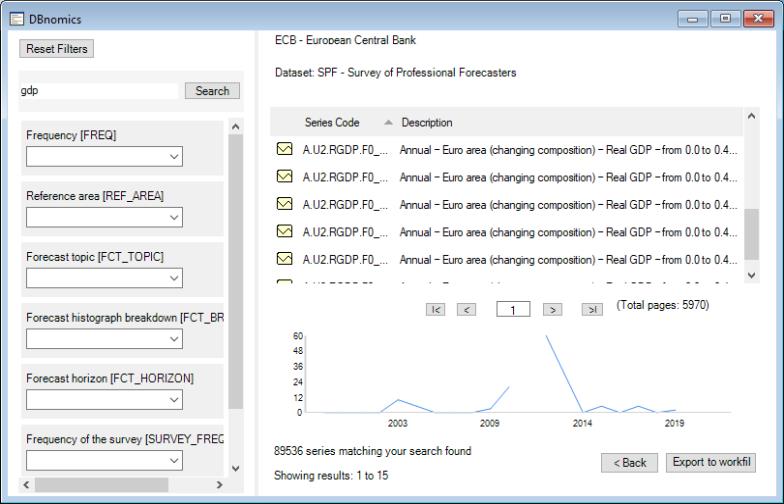
The and options will display a dialog where the user can view and select series. For the GDP search example, we may select the ECB provider using the SPF dataset:
This dialog contains a table where all the series matching the search are displayed. The interface provides a textbox where search criteria can be viewed or changed. It also provides a list of dropdown boxes that contain additional search filter criteria. By clicking a filter drop box one or more options can be selected. After selections are made the results of series will be updated to match the filter options. The interface also provides a graph preview of the data selected.
Once you have found and selected the series of interest, you may drag-and-drop or click the button to export the series directly into an existing or new EViews workfile.
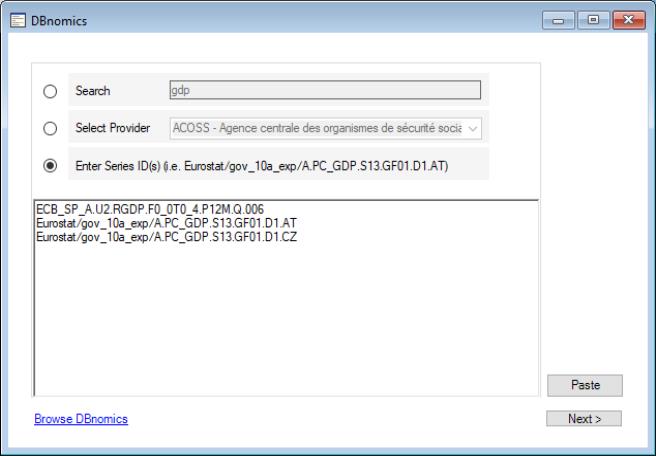
The third option is to enter a Series ID. Click the radio button and enter one or more series codes in the text area:
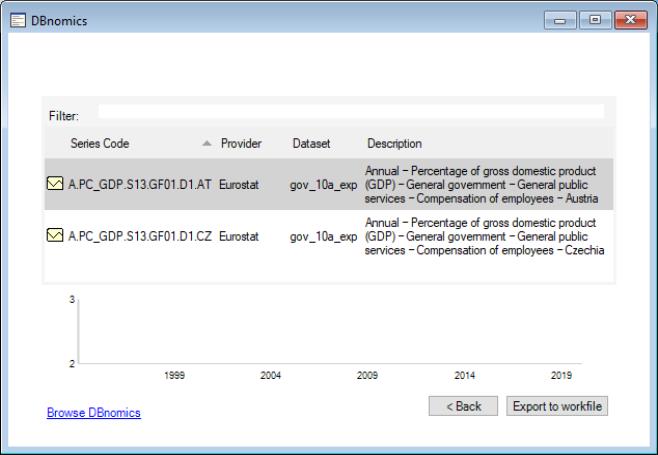
Use the button to view the series:
EViews displays a dialog that contains a table with all the series. The interface provides a way to filter through the results by typing a keyword in the textbox. It also provides a graph preview of the series data selected.
Once you have found and selected the series of interest, you may drag-and-drop or click the button to export the series directly into an existing or new EViews workfile.
EIA (U.S. Energy Information Administration)
The EIA database is a large collection of free and publicly available energy and related economic data provided by the U.S. Energy Information Administration. Both online access to EIA data via the EIA web server and offline access to data downloaded in the EIA Bulk File format are supported.
The EIA database interface is not available in EViews Standard Edition.
Online EIA Database
To open the EIA online database, simply select from the main EViews menu, then select from the dropdown menu:
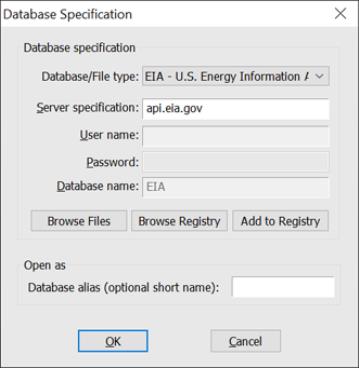
The server specification will be automatically filled in with the EIA server address “api.eia.gov”. This does not need to be changed. Click on to proceed.
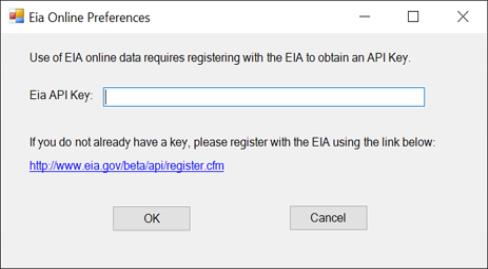
Use of the EIA online service is free but requires registration. The first time you attempt to open the EIA online database you will be asked to enter an API Key obtained from the EIA:
Please enter your API key and click on . The key will be saved as a user specific setting in your EViews “.ini” file. If you need to change the key at a later time, use from the EViews database menu to bring up the dialog again so you can modify your settings.
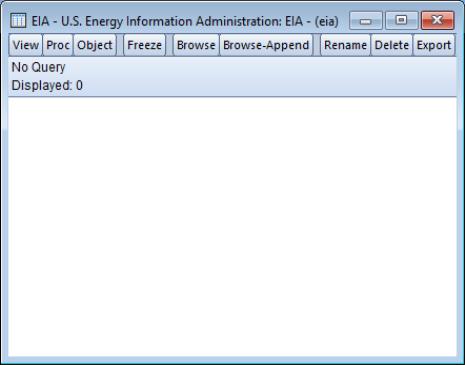
When you click on , EViews will open a standard database window:
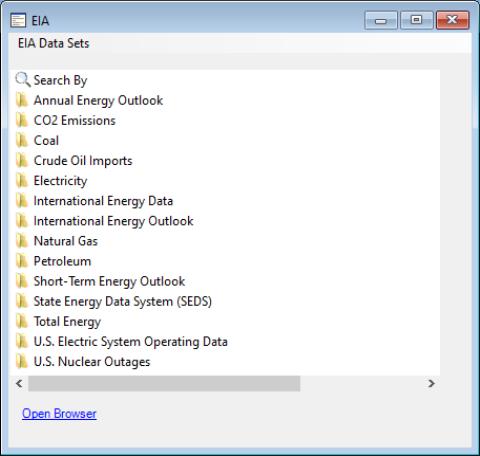
The EIA database connection supports a custom browser window for navigating through the EIA data. Click on to open the custom browser window. The standard database window will be minimized and the EIA browser window will open:
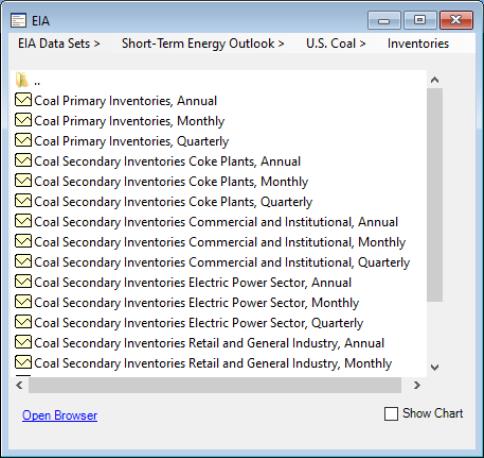
The browser window displays a link and the data sets available within the database as a set of folders, where each folder may contain additional folders or a list of series available for download. Clicking on a folder moves you into that folder and adds the folder to the path displayed at the top of the window:
You can return to the previous folder by clicking on the “..” folder icon at the top of the list, or move directly to any folder within the current path by clicking on the path component at the top of the window.
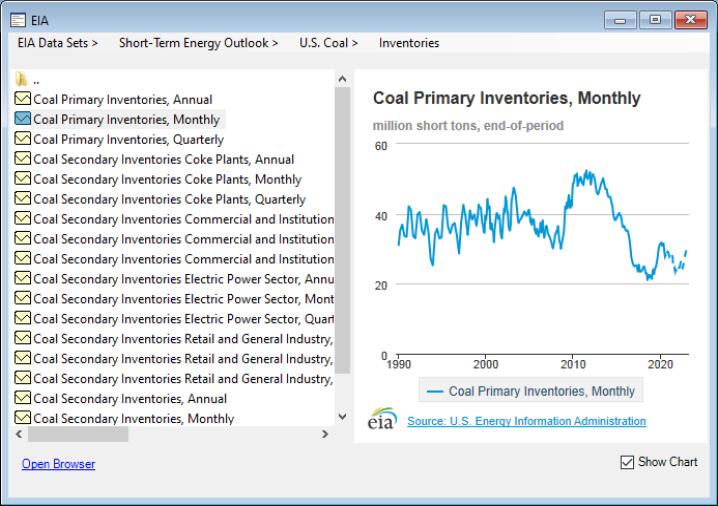
Select the checkbox at the bottom right of the dialog to view a chart of a selected series:
All the dialogs contain a link () to the API. Click on the link to get additional information including documentation.
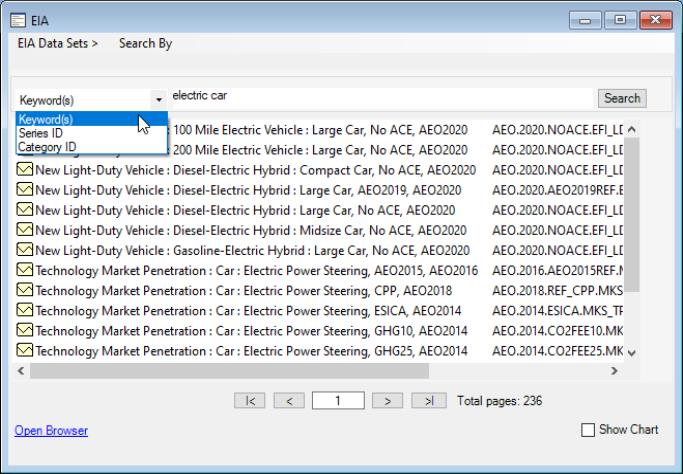
Additionally, the EIA Edx allows the user to search for one or multiple series. Click on the link to search for series by Keyword(s), Series ID, or Category ID.
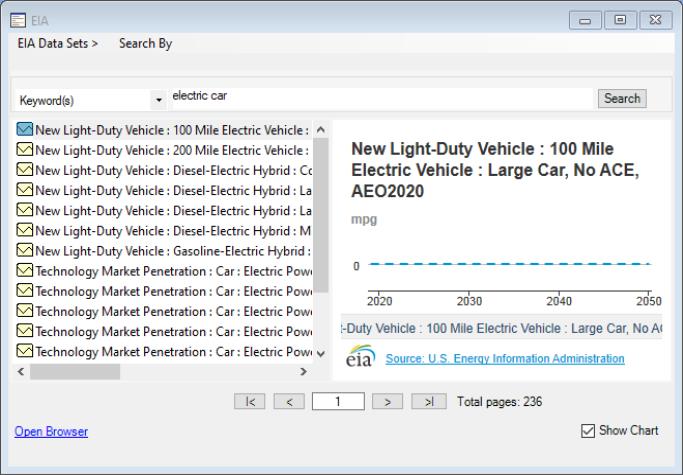
You can select the box to view the chart of a selected series:
Once you have found and selected the series of interest, you may drag-and-drop or copy-and-paste the series directly into an EViews workfile. When you have finished working with the browser, simply close the browser window to restore the regular EViews database window.
Offline EIA Bulk File - U.S. Energy Information Administration Databases
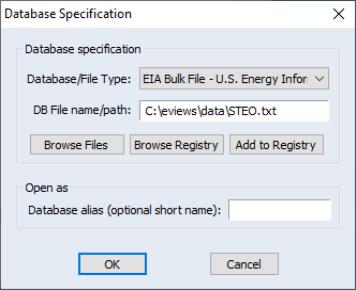
EViews also allows you to work offline with data downloaded from the EIA using the EIA bulk download facility. The bulk download feature allows you to fetch all series and category information from an entire EIA data set into a single local file. Downloading an entire bulk file is generally much more efficient than fetching a large number of series one at a time. Once the file has been downloaded, you can navigate within the dataset and bring data into EViews without reconnecting to the EIA servers.
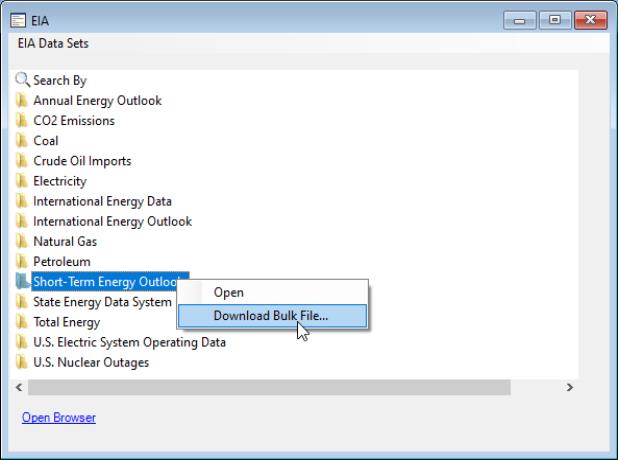
To download a bulk file, open the browser window of the EIA online database, right click on a data set, then select :
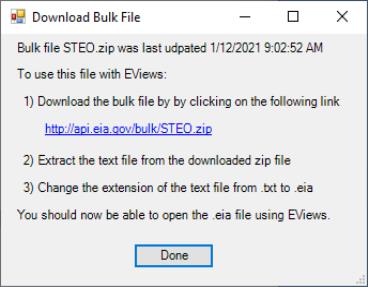
A dialog will appear giving instructions for downloading the file and preparing it for use by EViews:
Clicking on the download link will open your default web browser and start a download of the file. The bulk file is compressed in “.zip” format. You will need to use an unzipping utility to extract the single “.txt” file contained within the zip file.
Once the bulk file is ready, use , then click on to find the file, and then to open it:
Alternatively, you can drag and drop the file onto EViews to open it. First, however, you should rename the “.txt” file to “.eia” so EViews can tell that the file contains data in EIA bulk file format and is not a generic text file.
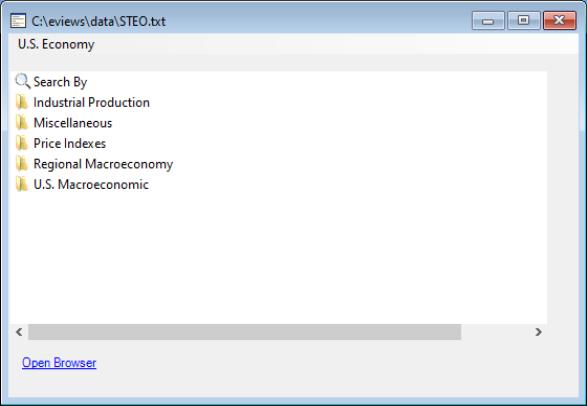
The caption on the window indicates that you are working with a local file. Otherwise, the interface behaves the same as when working with online data:
Note that some EIA datasets are large, potentially hundreds of megabytes of uncompressed data. When working with large files you may see a delay as the file is opened since EViews must scan the entire bulk file to find all series and category information stored in the file. Subsequent operations should be fast since all data is stored locally on your machine.
FAME
The FAME format is a binary file format written by FAME (SunGard MarketMap Analytic Platform) database products. FAME provides a variety of products and services for working with time series data.
The FAME database interface is not available in EViews Standard Edition.
In order to access FAME databases, a valid installation of FAME must already be available. EViews makes use of the FAME C Host Language Interface (C HLI) library, and will error unless the FAME .DLLs are correctly installed on the machine. EViews supports versions 8 and newer of the FAME libraries.
A local FAME database can have any file extension, and EViews supports access to a FAME database with any name. However, because many commands in EViews use the file extension to automatically detect the file type, you will generally find it easier to work with FAME databases which have the default “.DB” extension.
EViews also allows access to FAME databases located on a FAME Database Server. When working with a FAME server, the Server specification should be given in the form:
#port_number@ip_address
For example, the server specification for access to a FAME/Channel database might appear as:
#2552@channel.fame.com
Access to a server will require a valid username and password for that server.
Please contact SunGard directly (
http://www.sungard.com/fame) for further information about the FAME database system and other FAME products.
FRED
FRED (Federal Reserve Economic Data) is a publicly accessible database of more than 20,000 U.S. and international time series of multiple frequencies, provided by the Economic Research Division of the Federal Reserve Bank of St. Louis. The FRED database offers a wide variety of freely downloadable data, including interest rates, exchange rates, national income accounts, and many others. Data found in FRED are drawn from several national and international sources and is updated frequently.
For more information on the FRED database, please see
http://research.stlouisfed.org/fred2.
Please note that an internet connection will be required to obtain FRED data.
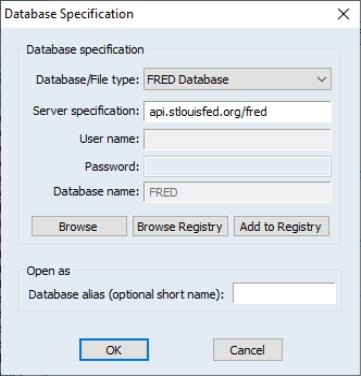
EViews offers a custom interface to the FRED data service provided by the Federal Reserve Bank of St Louis. The interface includes a custom browser for navigating the available FREDX data and adds support for retrieval of historical releases. To access the FRED database, use from the main EViews menus and choose “FRED Database”:
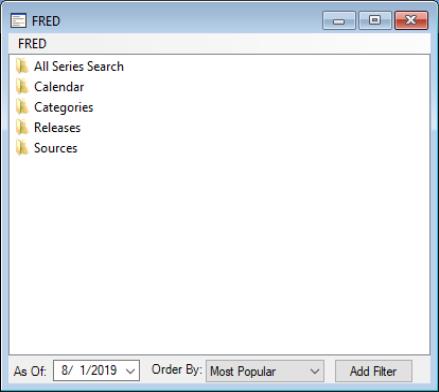
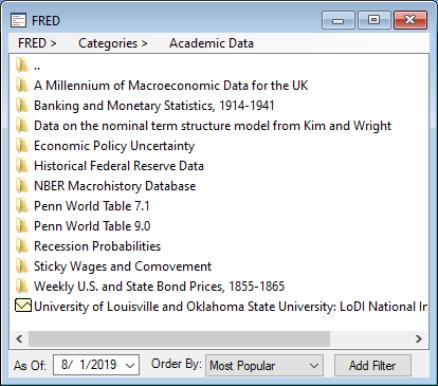
Click on to open the online database. You will be presented with a standard EViews database window with the and search interface. Click on or , which will open an all new custom FRED database. Click on the folder icons to drill down into subtopics:
The browser allows you to find data available within FRED by navigating through a set of nested folders. Simply click on any folder to move inside it.
The full path of the active folder will be shown in the header at the top of the window. You can click on any folder within the path to navigate back to that folder. Here, clicking on will move back up a single level to show the category choices. Similarly, clicking on the “..” in the window listing will move up a single level.
Once you have found the series of interest, you may drag-and-drop (or copy-and-paste) the series directly into an EViews workfile in the usual fashion.
The browser interface to FRED offers a number of useful tools for working with your FREDX database:
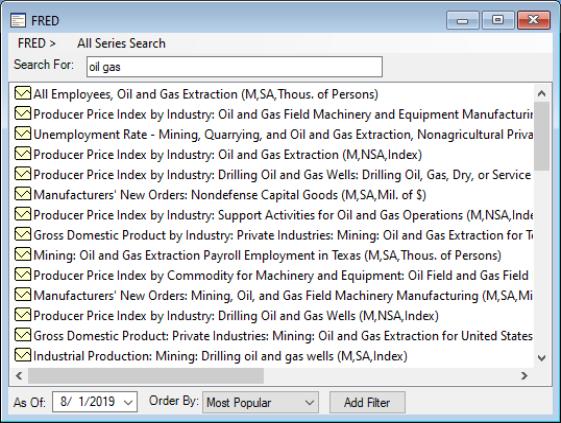
• Clicking on the folder in the FRED root directory changes the interface to allow searching by keyword. Simply enter one or more keywords into the Search For box and EViews will display a list of series that match those keywords.
• You can use the combo to change the order in which series are listed. By default, EViews will show the items first, but you can order by alphabetical order, , , , , and .
• You may click on the button to narrow the display list. Filters will be displayed at the top of the window and may be modified, disabled, or removed by clicking on the filter description in the header.
• You may use the dropdowncalendar to restrict the data to a particular vintage, which is handy when trying to match a particular data revision.
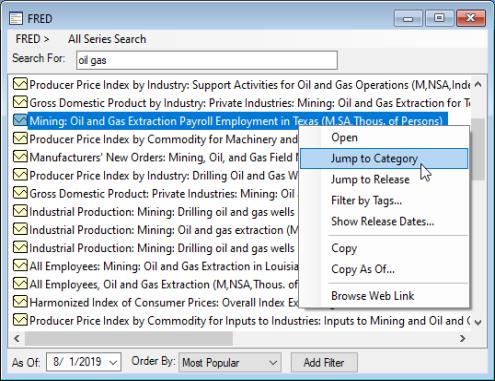
• Right-clicking on items in the browser will bring up a menu with items for performing useful tasks:
1. can be used to navigate directly to the folder within the category tree that contains the selected series. If the series appears in more than one category, a list will appear for you to choose which of the folders you would like to navigate to.
2. can be used to navigate directly to the statistical release that contains the selected series.
3. allows you to see the list of tags attached to a particular series. Tags are standardized concepts that may be used to filter which series are displayed within the browser window. You may check or uncheck the tags of a series to adjust the filtering currently in effect:
4. The menu item displays a list of release dates for the selected series. You may use this information in conjunction with the dropdown to retrieve the historical version of a series.
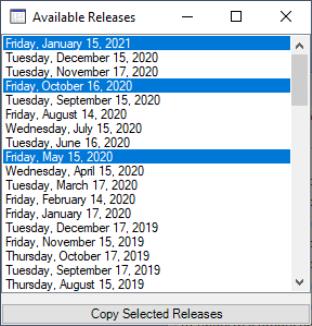
5. The right mouse button menu item allows you to retrieve multiple historical revisions at once. Simply select one or more series in the browser window, then click on to see a list of available releases. Select the releases yu would like to copy by clicking on them then click on the button at the bottom of the screen.
Haver
The Haver database format is a binary file format used by Haver Analytics when distributing data.
The Haver database interface is not available in EViews Standard Edition.
The main difference between Haver databases and other file formats supported by EViews is that Haver databases are read-only. You cannot create your own database in Haver format, nor can you modify an existing database. EViews will error if you try to do so.
Please contact Haver Analytics (
http://www.haver.com) directly for further information about Haver Analytics data products.
IHS Global Insight
The IHS Global Insight Database is a large and frequently updated international data offering for over 200 global markets. The Global Insight Database offers a modern interface for accessing the same data offered through the IHS Magellan interface.
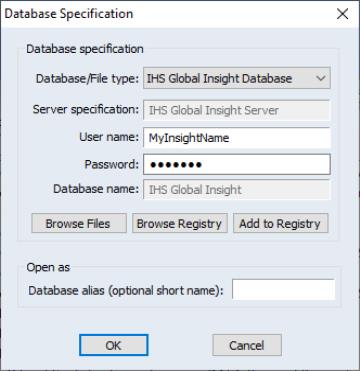
To access the Global Insight Database you must have a valid IHS MyInsight username and password, which can be requested from the IHS webpage (
http://www.ihs.com/products/global-insight/data-analytics/index.aspx).
The IHS Global Insight database interface is not available in EViews Standard Edition.
To open a connection to the IHS Global Insight Database, select from the main EViews menu, then select from the dropdown menu:
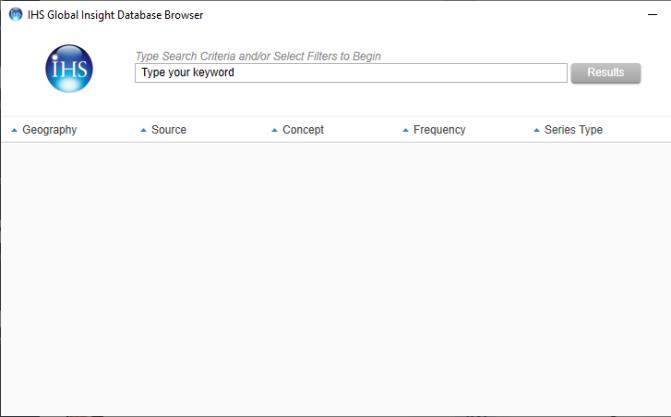
EViews will launch the Global Insight Database Browser, allowing you to search the database of series available from IHS:
For more information see the PDF guide to using the IHS Global Insight Database Browser from within EViews, available from our website:
www.eviews.com/download/download.html.
IHS Magellan
You may use EViews to access IHS Global Insight data stored in Magellan data banks Please note that an internet connection and a MyInsight account will be required to obtain IHS Magellan data.
(Note: the IHS Magellan interface has largely been replaced by the newer IHS Global Insight Database Browser; see
“IHS Global Insight”.)
Bank Names
There are two ways of specifying a particular Magellan series in an EViews command:
• using series type (e.g. “gdp.q.hist”)
• using bankname (e.g. “us\gdp.q”)
Both of these identifiers will work no matter what bank name was specified when opening the database.
The bank name specified when opening a database only affects what happens when you use an incomplete series identifier (containing neither a series type nor a bank name).
When you specify a particular bankname when opening a database, this bankname is used as the default bankname for all operations in the database. This means that whenever you specify a series name without a leading bankname, this default bankname will be added to the front of the name. So, if you open a database with bank “US”:
• “fetch gdp.q” will be interpreted as “fetch us\gdp.q”.
• doing an easy query for “name matches gdp*” will be interpreted as an easy query for “name matches us\gdp*”.
When you specify the special “all banks” keyword when opening a database (“IGI”) then there is no default bank. In this case a bank name is never added to any series names, but the series type “.hist” will be added whenever a series type is required but has not been specified in a name. So
• “fetch gdp.q” will be interpreted as “fetch gdp.q.hist”.
Note that in either case, you can always override the bankname specified during database open in Easy Query by adding an explicit “bankname\” to the beginning of the name. Thus, name matches “us\*” and description matches “iron steel” will produce the same results no matter the default bankname.
Special Handling of Mnemonics
EViews recognizes mnemonics in IHS Magellan databases that have illegal EViews characters (“@,” “&,” etc.) and will, if possible, prompt to rename the series before transferring it to your active workfile. The default replacement for illegal characters is an underscore. If you are using a command to fetch data, EViews will automatically replace an illegal character with an underscore.
Note that EViews drops the frequency identifier when a series is pulled into the workfile if the frequency of the series fetched matches the workfile frequency. If the original series does not match the workfile frequency, EViews will note this fact and convert the series to the workfile page frequency using the series defaults and prompt you for a name change.
For example, if you fetch the Magellan series GDP.Q into an annual frequency page of a workfile, EViews will convert the data in GDP.Q to an annual frequency (i.e., averaging the four quarters, if average is the default for high to low frequency) and it will prompt for a series name since “GDP.Q” is not a legal EViews name. The prompt will suggest the name “GDP_Q,” but you will have the option to provide different name. If instead you fetch GDP.A into the annual-frequency workfile, EViews will automatically drop the “.A,” leaving the series GDP in the workfile.
(Note that while this method of fetching data will provide you with a quarterly series from one that is reported at a monthly frequency, an better approach might be to bring the monthly series into a monthly page, then link the data into a quarterly page.)
Special Handling of Frequencies
There are two rules to make handling of Magellan (and AREMOS) frequencies easier in EViews:
1. When fetching into a workfile, if the Magellan series identifier does not contain an explicit version/frequency, EViews will add a version/frequency based on the frequency of the destination workfile.
2. When fetching into a workfile, if the Magellan version/frequency matches the version/frequency of the workfile being fetched into, then EViews will automatically trim the version/frequency from the name.
Examples:
• “fetch gdp” into a quarterly workfile will try to fetch “gdp.q” (using rule 1) and then discard the version “.q” from the name (using rule 2) so that the series appears in the workfile as “gdp.”
• “fetch gdp.q” into a quarterly workfile will also discard the version “.q” from the name (using rule 2) so that the series appears as “gdp.”
• “fetch gdp.m” into a quarterly workfile will not match either rule, so the series will keep the illegal name “gdp.m” which EViews will suggest renaming to “gdp_m.”
• copying a series from a Magellan database into an EViews database will never use either rule (because EViews databases do not have a default frequency).
Running EViews from a Network Folder
When running EViews from a folder on a local network, the IHS Magellan database extension may fail to load properly due to a restrictive Runtime Security Policy for .NET assemblies. By default, the .NET Framework does not allow the use of .NET assemblies that are located on a network folder. In order for this extension to work properly with EViews, you must grant FullTrust permissions to the EViews network folder.
To do this, go to a computer that will run EViews:
1. If you haven't already done so, run EViews on that machine. If the dialog does not appear automatically upon startup, run the regcomponents command to bring it up manually. Verify that all required components have been registered properly on this machine. Click the button to register (or re-register) and wait for confirmation of success.
2. Shutdown EViews (if it is already running).
3. In Control Panel, open Administrative Tools.
4. Run “Microsoft .NET Framework 2.0 Configuration.”
5. In the left tree-view, expand the node “.NET Framework 2.0 Configuration/My Computer/Runtime Security Policy/Machine/Code Groups/All_Code.”
6. Under “All_Code,” right-click “LocalIntranet_Zone,” then click on .
7. Enter a name and description (e.g. “EViews Network Share”). Click .
8. In the “Choose the condition type for this code group” list, click “URL.”
9. In the “URL” box, type in the full path to your EViews network file share followed by an asterisk to allow any extensions in that folder to run with the new permissions (e.g. “\\servername\folder\EViews 9\*”). Click .
10. Select “Use existing permission set” and then select “FullTrust” from the dropdown list. Click .
11. Click .
12. Restart EViews from the network folder to obtain the new permissions. Try opening a database using the IHS Magellan database extension to verify it loads properly.
You will have to repeat this procedure on each computer that will run EViews in order to get the IHS Magellan database extension working properly from the network.
IHSMarkit
IHSMarkit provides access to financial data from a large number of datasets. To access IHSMarkit data from EViews, you must have a currently active account to the IHSMarkit data API and be able to log into it on your machine.
The IHSMarkit database interface is not available in EViews Standard Edition.
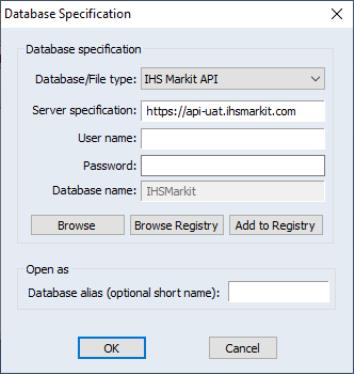
EViews offers a custom interface to IHSMarkit data. To open the database, select from the main EViews menu, then select IHSMarkit from the dropdown menu:
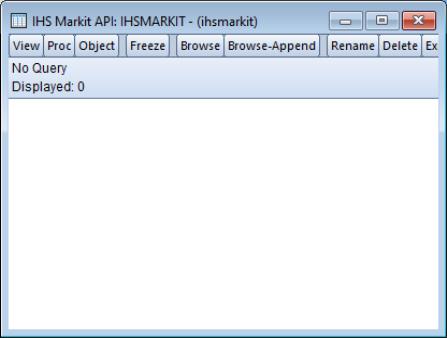
You are required to enter and information before you click on . EViews will verify your user information and open a standard database window:
Click on to open the custom IHSMarkit window:
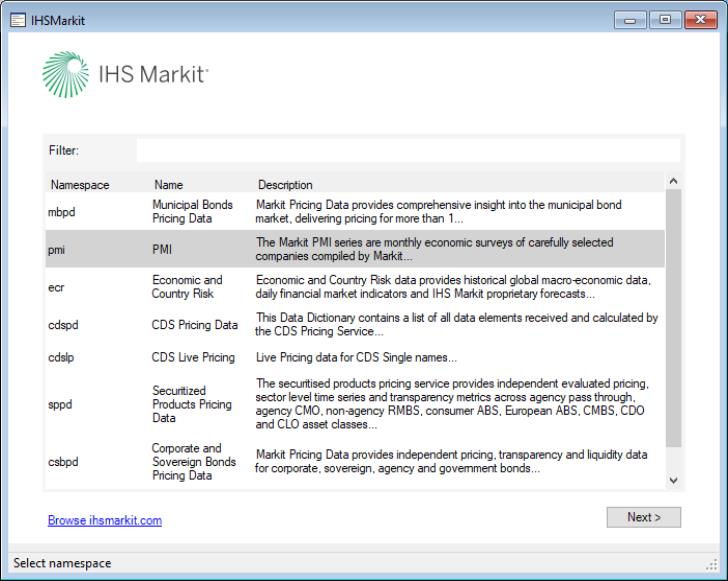
The dialog allows you to select data available within datasets using the field. You may also search through the datasets by typing a keyword in the textbox. For this example, select a dataset and click the button:
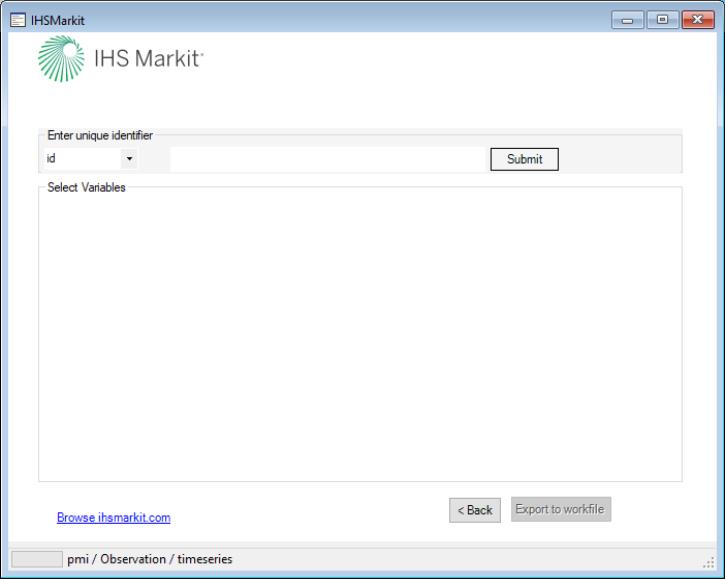
Select the type of identifier (id, cusip, isin, etc.) you want to use in the drop-down box. Type or paste a unique id and click the button:
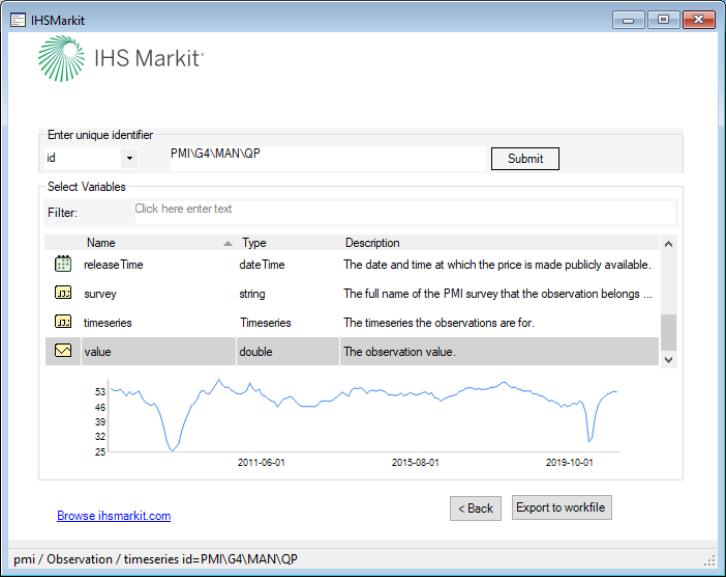
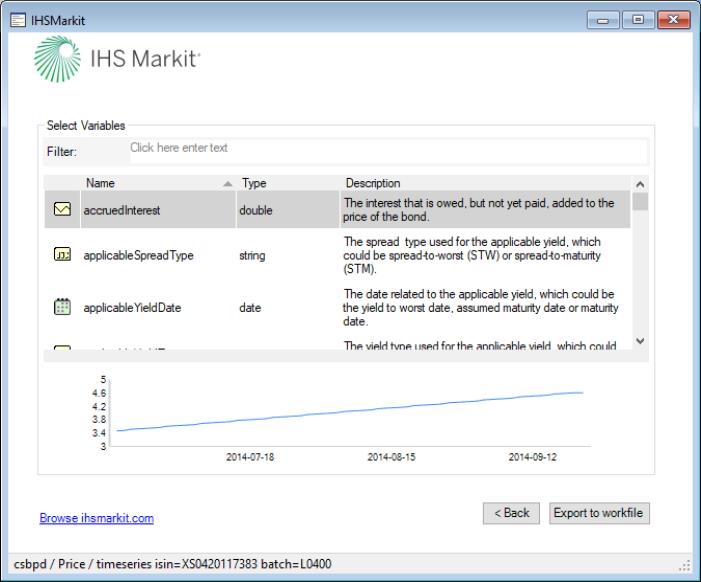
The dialog interface will display the list of variable names, their types, and a description. Type a keyword in the textbox to filter the results. The interface also provides a graph preview of the series data selected. Once you have found and selected the series of interest, you may drag-and-drop or click the button to export the series directly into a new or preexisting EViews workfile.
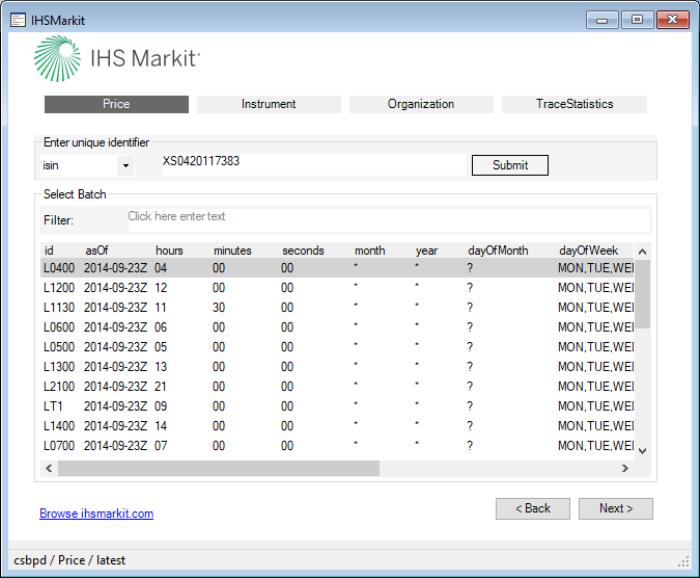
We may go back to the top level and select the Corporate and Sovereign Bonds Pricing Data. The pricing data is organized into batches:
When batch information is available, after a unique id is entered the results table will show a list of batch-ids and metadata information. Type a keyword in the textbox to filter the results.
Note that in the example shown in the dialog above, there are four tabs/buttons (Price, Instrument, Organization, TraceStatistics). The IHSMarkit API identifies these as and they represent additional categories with uniquely identified records. In the above example we have selected (the Entity Price defines the price, yield, spreads and other metrics of an instrument.).
Select a batch id and click the button:
The dialog interface will display the list of variable names, types, and descriptions. Type a keyword in the textbox to filter the results. The interface also provides a graph preview of the series data selected. Once you have found and selected the series of interest, you may drag-and-drop or click the button to export the series directly into a new or preexisting EViews workfile.
All of the IHSMarkit Edx dialogs contain a link (Browse ihsmarkit.com) to the API. Click on the link to get additional information, including documentation.
Moody’s Economy.com
The Moody's Economy.com format is a binary file format written by Moody's Economy.com tools. Moody s Economy.com features a database containing more than 190 million economic, financial, and demographic time series covering more than 180 countries and their sub-regions.
Reading of Moody’s Economy.com formatted data is not supported in EViews Standard Edition.
Additional information on Moody's Economy.com databases can be found at
http://www.economy.com.
NOAA (National Oceanic And Atmospheric Administration)
The National Oceanic and Atmospheric Administration (NOAA) offers an extensive range of publicly available weather and climate datasets. For further details on NOAA data offerings, refer to:
EViews 14 offers an all new interface that enables users to interact with EViews while simultaneously searching for data through the EDX dialog. This new NOAA database dialog includes a user-friendly table where all selected entries for import are recorded, facilitating the direct importation into a workfile. This process significantly enhances user workflow and efficiency, providing a seamless experience for data retrieval and integration into EViews.
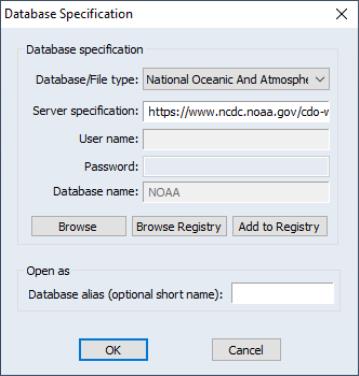
To access the NOAA database, choose File/Open Database from the main EViews menu, and then select from the Database/File type drop down menu.
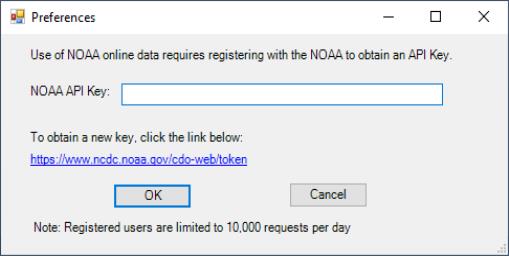
When opening the NOAA database for the first time, you'll be asked to enter an API Key obtained from the National Oceanic and Atmospheric Administration.
Enter your API key and click OK. The key will be saved as a user specific setting in your EViews “.ini” file. If you need to change the key later, select View/Preferences from the EViews database menu to modify your settings.
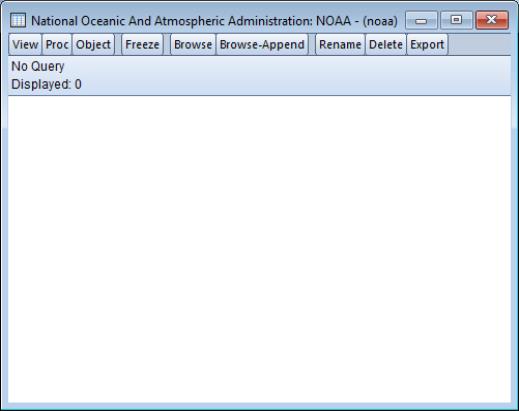
When you click on OK, EViews will open a standard database window.
Click on Browse to open the custom NOAA window:
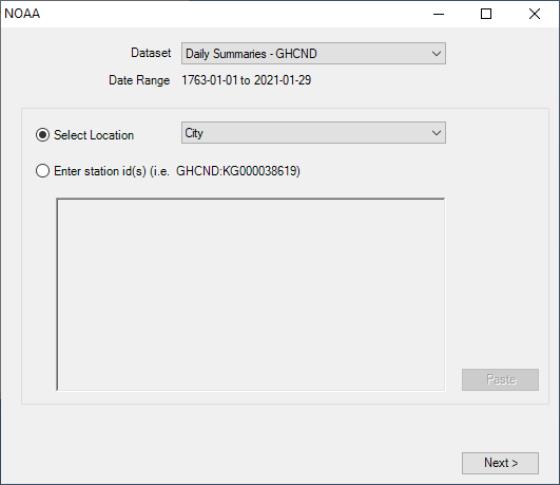
This custom interface will allow us to drill down through dataset, location, data type, and station selection to specify the data of interest.
When you first display this dialog, the area will be empty.
To select the data, first specify a dataset using the Dataset drop down menu.
You may then choose to Fi by clicking on the button to select one or more locations from a list, or you elect to Load from Stations by clicking on the button to specify stations using Station IDs.
Find Data By Location
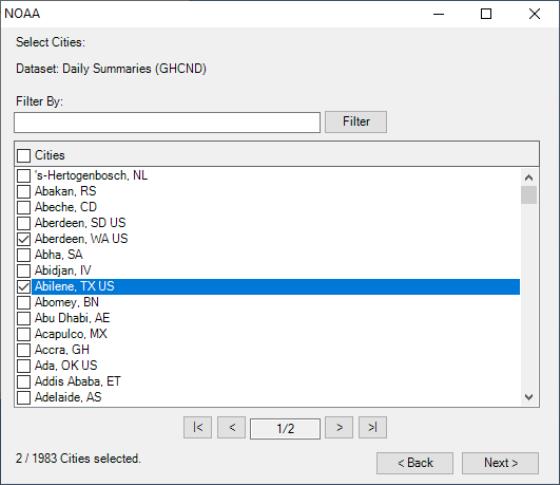
If you choose click on the button to Fi, a dialog will be displayed to walk you through the selection process:
The drop down menu at the top should be used to specify a Location Category to browse:
You may choose from a variety of location categories including, for example, , , , , and .
You can filter the displayed list of locations using a text string by entering the text in the edit field, and clicking on the button.
Select the desired locations from the list and click Next to continue.
If you select a single location, you will see a dialog prompting you to select specific data types for the selected location:
You may use the filter to pare the list if desired. Click to select and deselect the entries.
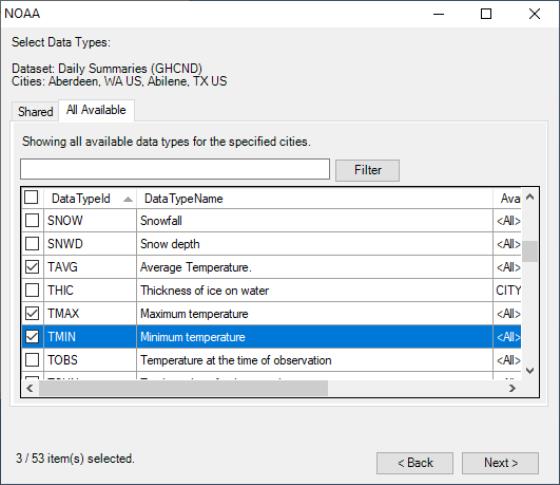
If you selected multiple locations in the location step, a EViews will display a dialog with two tabs: a Shared tab showing data types common to all of the locations, and an All Available tab listing all available data types across all of the locations.
Use the Filter edit field and button to refine your search in the lists on both tabs, select the data types of interest, and click Next to view the available NOAA stations.
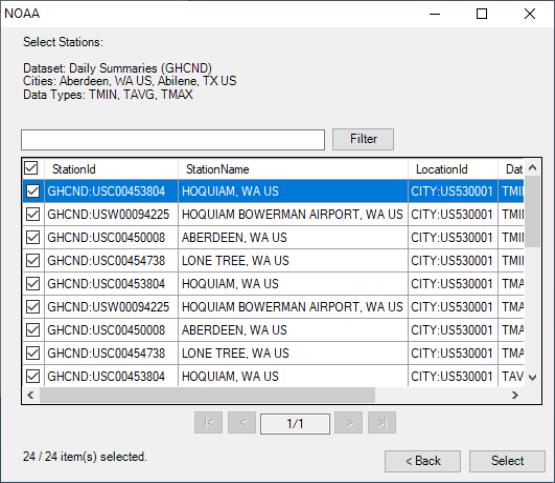
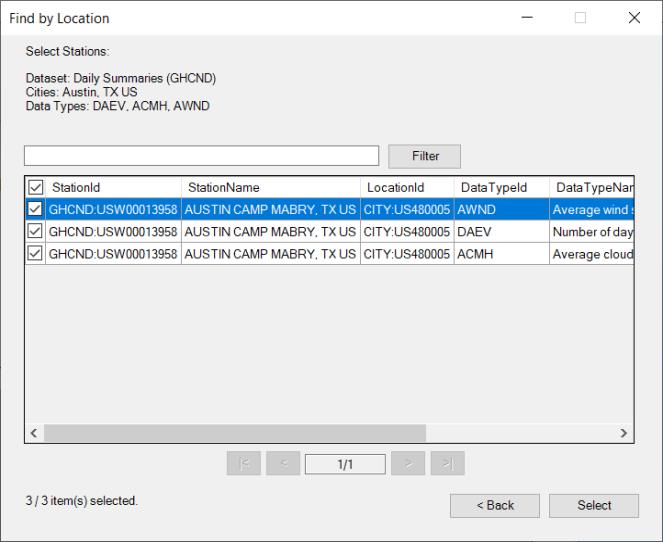
In the next dialog, you will find the available stations that match the selected data types and locations.
Choose the desired stations from which you want get data and the click Select.
You will be asked to select a date range in order to limit the data results. NOAA restricts requests for annual and monthly data to a ten-year range; all other frequencies are restricted to a one-year range.
Click on to continue and display the main NOAA dialog:
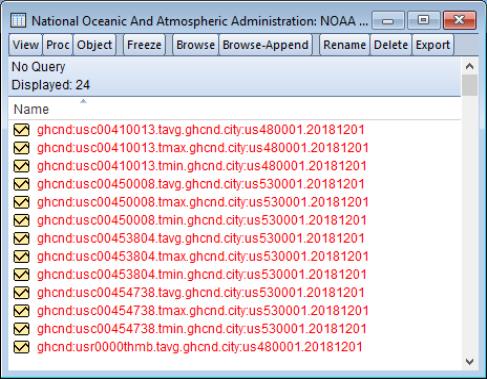
You will see in the Selection table the data you have just selected from your search. You can directly export these data to a workfile or find additional data before proceeding with the export.
Locations From Stations
If you select Load Stations, instead of Find by Location, the displayed dialog will contain a textbox where you can manually type or paste from the clipboard the station IDs from which you want to retrieve data:
Click on to continue.
The next dialog will prompt you to select the data types. Once again, the dialog will feature one tab if there is a single location, or two tabs, a Shared tab for data types common to all of the locations, and an All Available tab for available data types across all of the locations.
Select the desired data types and click Next to display the next dialog where you will to select station and data type combinations:
Click on Select to continue to the final dialog where you will choose the date range:
As before, note that NOAA restricts requests for annual and monthly data to a ten-year range; all other frequencies are restricted to a one-year range.
Click on to continue and display the main NOAA dialog:
Click the Export to WorkFile button to export the chosen data to either an existing or a new workfile.
Statistics Canada (StatCan SDMX) Database Connectivity
EViews 14 offers easy-to-use connectivity to online databases from Statistics Canada, the Canadian national statistical office through EViews’ enhanced SDMX interface (
“OECD SDMX (Organisation for Economic Cooperation and Development Statistical Data and Metadata eXchange)”).
The Statistics Canada database interface is not available in EViews Standard Edition.
To begin, open the database windows by selecting File/Open Database from the primary EViews menu, select from the Database/File type drop down menu,
Click on to proceed and open the data browser
The left-hand side of the data browser offers tree interface through which may navigate until you locate the desired dataset.
Alternately, you may use the Filter edit box to input a keyword, enabling a search across all categories and datasets.
Once you locate the desired dataset, you can either double-click on the dataset in the list on the right section or select it and then click Next to display the filter page.
Note that the StatCan SDMX databases offers a data browser on their official website that allows you to search for a dataset. Click on the Open in Browser button, which will open a web browser window showing the official database website.
To enhance the performance of the data explorer interface, categorization information is cached when the interface is first loaded. While a remote possibility, the database information may be updated during your EViews session. To refresh the cache, you may click on circular arrow Refresh button in the upper-right hand portion of the dialog.
You may use the filter page to refine your search. See
“Selecting Series” for additional detail. Once you have the data series desired, you may click on to download the data into an EViews workfile.
OECD SDMX (Organisation for Economic Cooperation and Development Statistical Data and Metadata eXchange)
SDMX Databases contain a large range of publicly available data. EViews offers direct access to the following online SDMX databases:
Please note that an internet connection is required to obtain SDMX online data. For more information on the datasets, please see the links above.
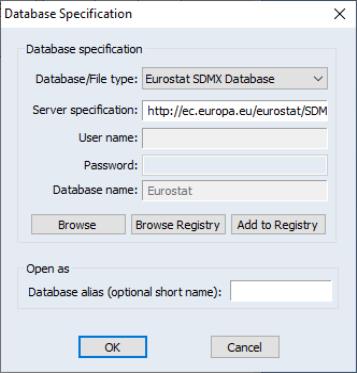
To begin, open the database windows by selecting File/Open Database from the primary EViews menu, select the desired SDMX database from the Database/File type drop down menu,
and click on OK to continue.
EViews displays the standard database dialog, indicating that you have an active connection to the data.
Click on Browse or Browse-Append to open the database.
Selecting a Database
EViews offers one of two different interfaces for selecting a SDMX database: a tree structure navigator and filter for databases that offer dataset categorization information, and a simple scroll and filter interface for databases without categorization information.
Categorized Datasets
If the SDMX database offers categorized datasets, the dialog interface offers features that facilitate dataset exploration through a nested tree structure.
The tree interface makes it easy to select or search for a specific category and then navigate through the nested tree until you locate the desired dataset. Simply use the tree structure on the left-hand pane to drill down to the desired subcategory, clicking on the node indicators as needed to inspect the contents. You may also double click on folders displayed in the right-hand pane to show its contents.
Alternatively, you can use the Filter edit box to input a keyword, enabling a search across all categories and datasets.
Once you locate the desired dataset, you can either double-click on the dataset in the list on the right section or select it and then click Next.
Some SDMX databases offer a data browser on their official website that allows you to perform more advanced search. Click on the Open in Browser button, which will open a web browser window showing the official database website.
To enhance the performance of the data explorer interface, categorization information is cached when the SDMX interface is first loaded. While a remote possibility, the database information may be updated during your EViews session. To refresh the cache, you may click on circular arrow Refresh button in the upper-right hand portion of the dialog.
Non-Categorized Datasets
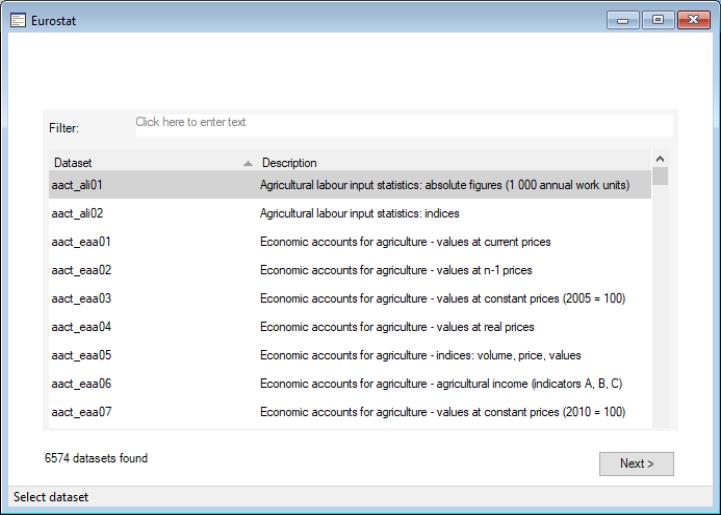
Alternatively, for SDMX databases that do not offer categorization information, the dialog interface simply offers a list of the available databases:
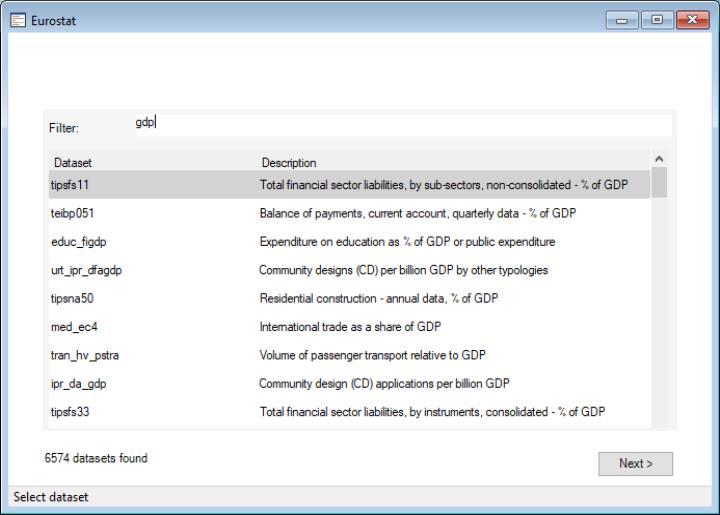
You can type a keyword in the Filter edit field to find a dataset. Select the dataset and click Next to continue.
Selecting Series
In this dialog, you will choose the series to import:
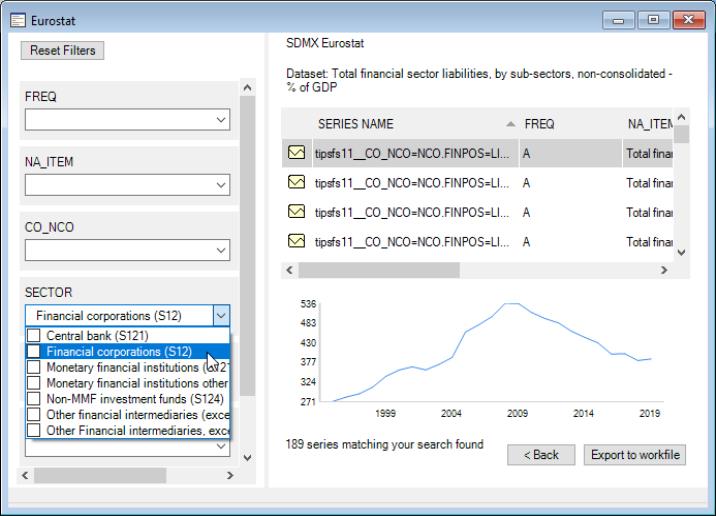
We begin by forming a list of potentially relevant series. By default, all of the series in the dataset will be in the list. If available, you may use filters on the left-hand side of the dialog to reduce the number of series to be read. To specify a filter, click on the button on the left-hand side of the dialog corresponding to a specific category. You will be presented with a dialog showing the possible filter elements:
Click on the filter element entry to toggle the selection. You may use the button to locate a specific filter entry.
Here we use the to require data to be calendar and seasonally adjusted data:
Once the filter definition for the category is complete, click Save to save the filter settings and return the main selection dialog.
The dialog lists any relevant filter elements in text form under the name of the filter. If the information is not fully legible, you may hover your cursor over the text to see the full specification.
Once you finish defining any selection filters, click on the button to load a list of the relevant series in the dataset:
Here, there are 167 series found in the dataset that match the current filter. Click on any of the entries on the right to display information about the individual series and to display a thumbnail graph of the series.
You may go back and specify additional filters and click on the button to update the list of relevant series.
Finally, you may select one or more series in the list, then click on the Export to workfile button to load the selected series into a new or existing workfile.
Note that the Refresh Data button in the upper-right corner may be used to ensure the database information is up-to-date. For some databases, there will also be an Open in Browser button which will take you to the selected dataset on the database website if available. This feature is applicable only to those databases that offer an online data browser.
RATS 4.x
The RATS 4.x format is a binary file format used by RATS Version 4 through 7 on all platforms.
The main issue to be aware of when working with RATS 4.x format files is that the “.RAT” extension is also used by RATS version 3 files. EViews will neither read from nor write to RATS files in this earlier format. If you try to use EViews to open one of these files, EViews will error, giving you a message that the file has a version number which is not supported.
To work with a RATS Version 3 file in EViews, you will first have to use RATS to translate the file to the Version 4 format. To convert a Version 3 file to a Version 4 file, simply load the file into RATS and modify it in some way. When you save the file, RATS will ask you whether you would like to translate the file into the new format. One simple way to modify the file without actually changing the data is to rename a series in the file to the name which it already has. For example, if we have a Version 3 file called “OLDFILE.RAT”, we can convert to a Version 4 by first opening the file for editing in RATS:
dedit oldfile.rat
then listing the series contained in the file:
catalog
then renaming one of the series (say “X”) to its existing name
rename x x
and finally saving the file
save
At this point, you will be prompted whether you would like to translate the file into the Version 4 format.
See the RATS documentation for details.
SDMX-ML Files
SDMX (Statistical Data and Metadata eXchange) standardizes the processes for the exchange of statistical data among international organizations. EViews offers an interface to SDMX data where the user has the ability to read SDMX datasets and data structure definitions (DSD) in structured XML documents (SDMX-ML), using the standard EViews database interface. EViews allows you to work offline, with data from organizations like EUROSTATA, ECB, IMF, UN, BIS, and OECD. Please note that the EViews SDMX-ML interface requires that data were previously downloaded in SDMX XML format.
SDMX-ML support is not available in EViews Standard Edition.
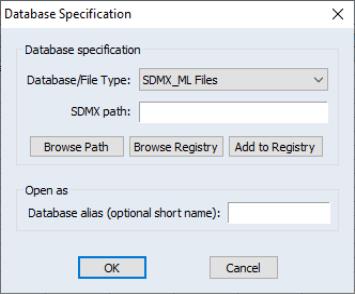
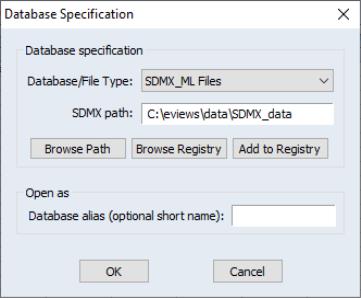
To start, you must open a database window to SDMX-ML by selecting File/Open Database… from the main EViews menus, then selecting SDMX-ML files from the dropdown menu. The following dialog should appear:
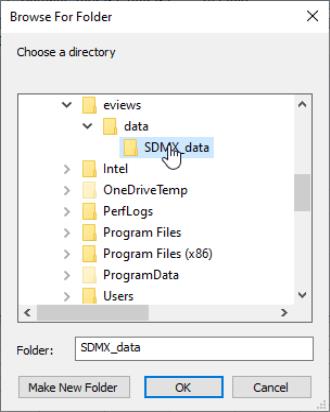
Click on Browse Path to select the folder/path on disk where the SDMX data and data definitions files are located.
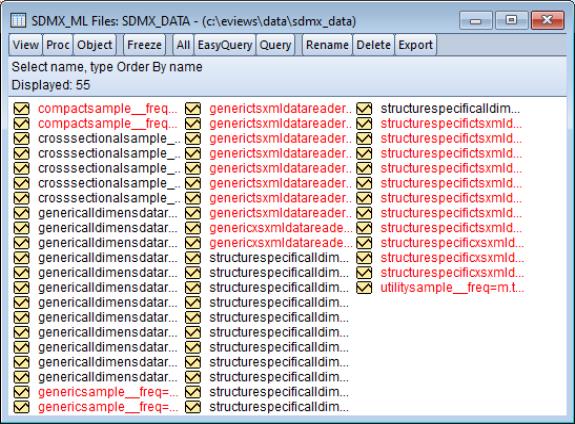
Click on to open the database. You will be presented with a standard EViews database with the , and search interface, to view all or a selection of the data series:
Once you have found the series of interest, you may drag-and-drop (or copy-and-paste) the series directly into an EViews workfile in the usual fashion.
Trading Economics
Trading Economics provides access to a large range of historical and forecast data for economic indicators, stock markets, government bonds, exchange rates, and commodity prices.
An internet connection is required to obtain Trading Economics online data. For more information on data subscriptions, please see:
The Trading Economics database interface is not available in EViews Standard Edition.
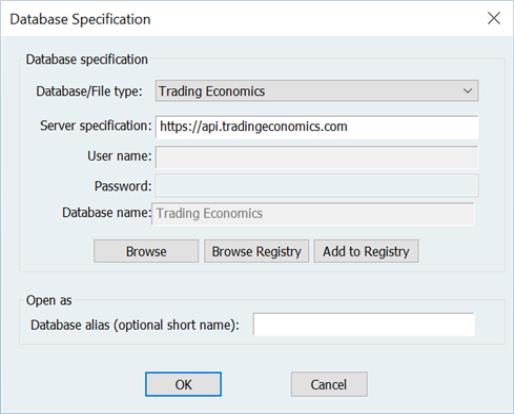
EViews offers a custom interface to Trading Economics data. To open the database, select from the main EViews menu and select from the dropdown menu:
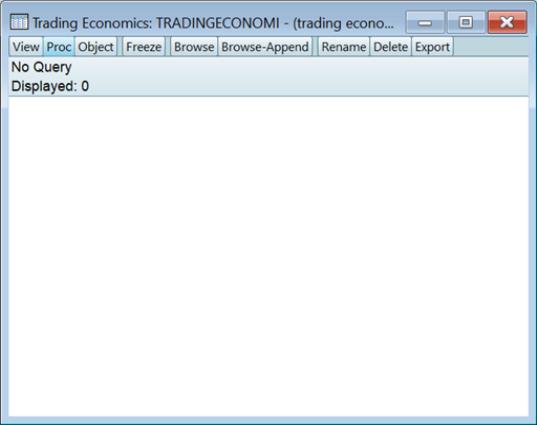
Click to open the standard EViews database window:
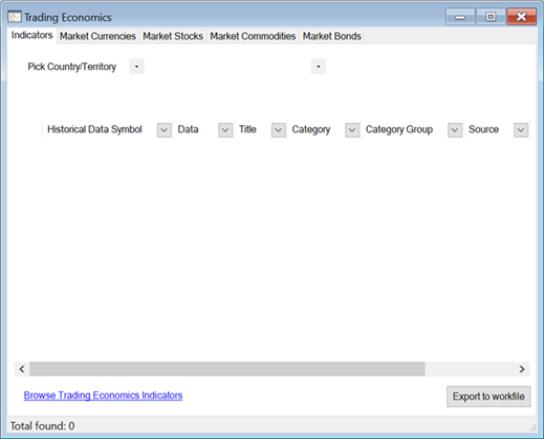
Click on in the toolbar to open the custom Trading Economics window:
The dialog interface displays five tabs, or categories, of data: , , , , and .
Indicators
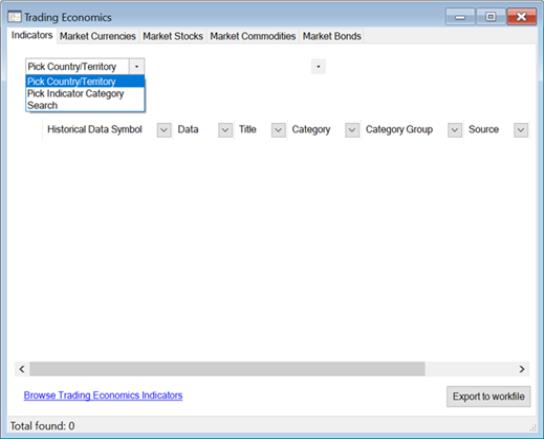
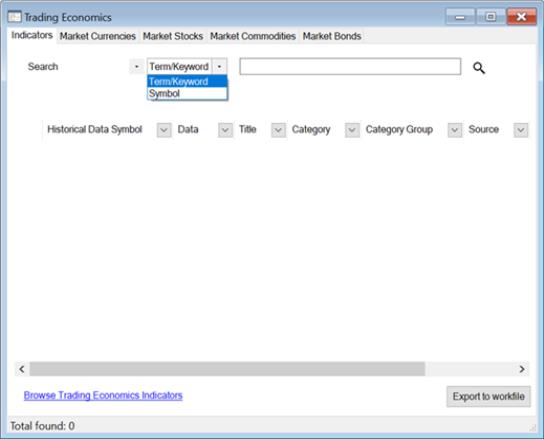
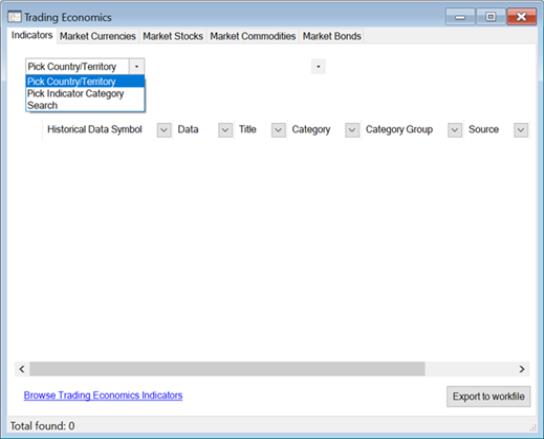
Under the tab, choose between picking a country/territory, an indicator category, or a search:
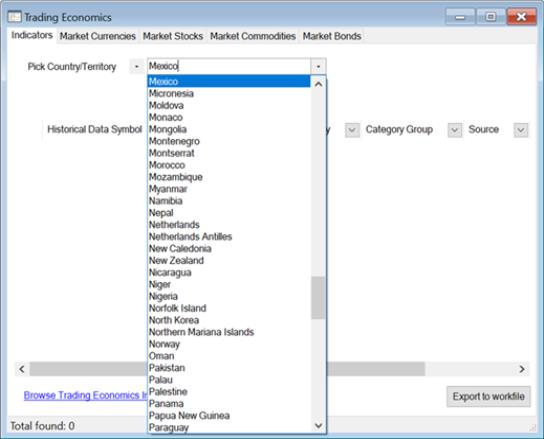
For select a country from the drop-down box to see historical and forecast indicators:
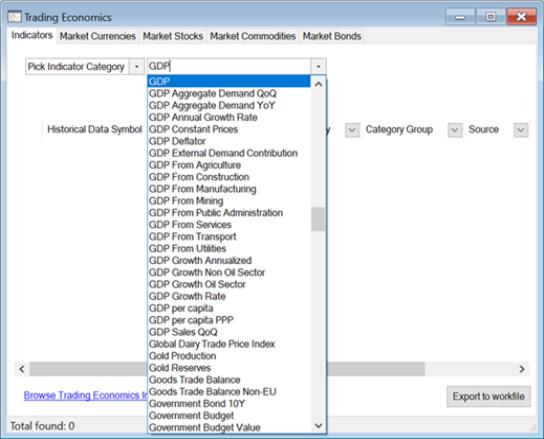
For Pick Indicator Category, select a category from the drop-down box to see historical and forecast indicators:
For , select or and enter an expression in the text box:
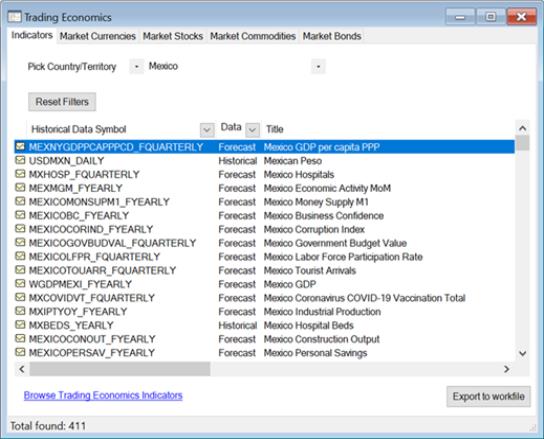
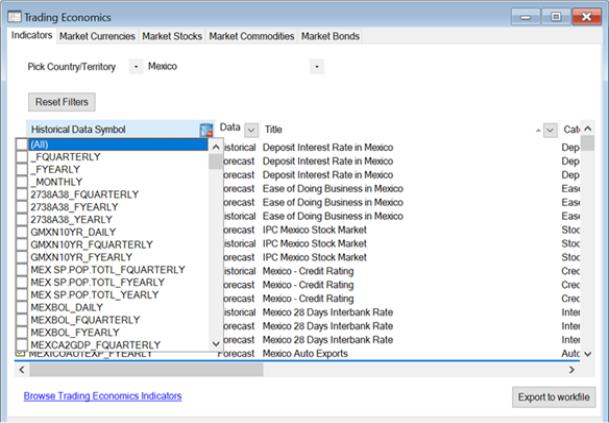
The user interface provides a way to filter through the results regardless of the method chosen. After picking the country Mexico, for example, the dialog displays a table with the indicator results:
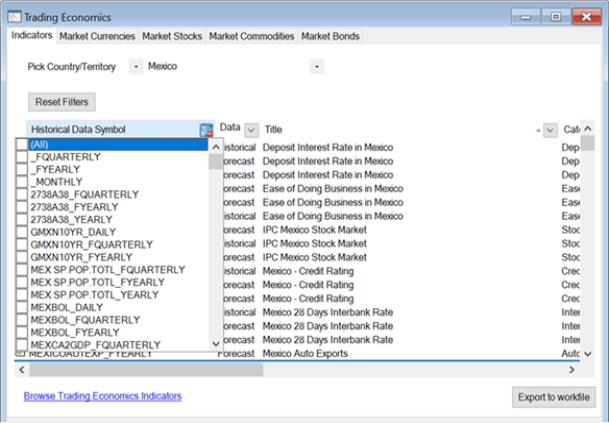
Click the drop-down box next to each column header to show a set of filter checkboxes. Select one or more of these to display selected values or select to show all values. Click to clear all filters.
Markets
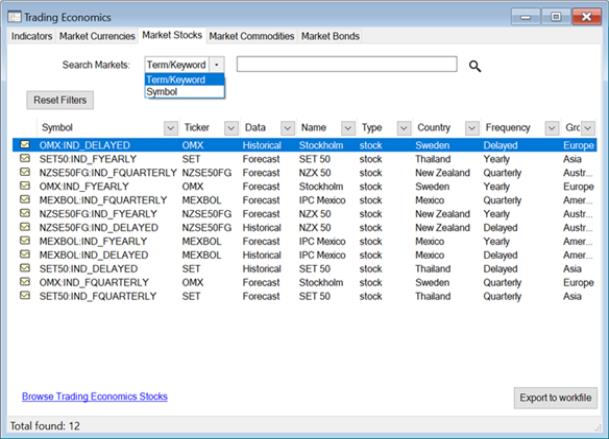
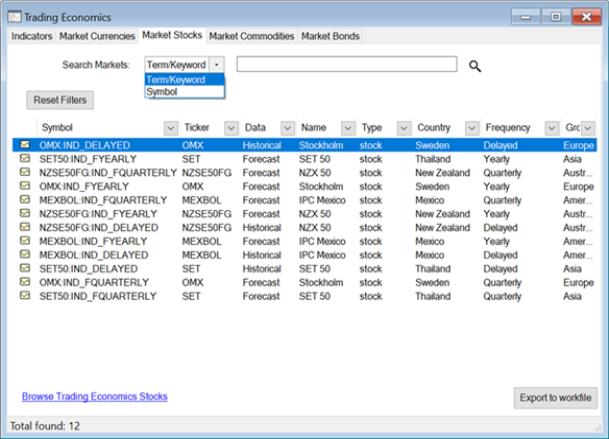
If any of the market tabs (, , , ) are selected, the dialog will display a table with all the stock market symbol results you have permission to see based on your subscription. For example, the below dialog shows the tab:
You may elect to search for a or a . Once the series of interest is found and selected, drag-and-drop or click the button to export the series directly into a new or existing workfile.
For more information click the link at the bottom of the dialog to open the Trading Economics webpage.
World Bank Data
EViews offers a custom interface to World Bank data. World Bank Open Data provides access to a list of datasets that offer access to global development data. These databases offer a wide variety of freely downloadable indicators about development in countries around the world.
For more information on the World Bank datasets, please see
http://data.worldbank.org.
Please note that an internet connection will be required to obtain World Bank data.
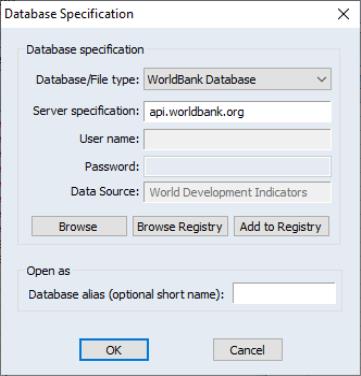
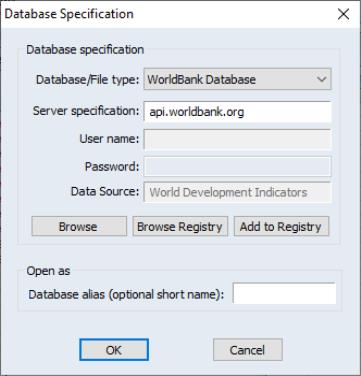
EViews offers a custom interface to the World Bank. The interface includes a browser for navigating and retrieval of World Bank data. To start, you will open a database window by selecting from the main EViews menus, then selecting World Bank Database from the dropdown menu. The following dialog should appear:
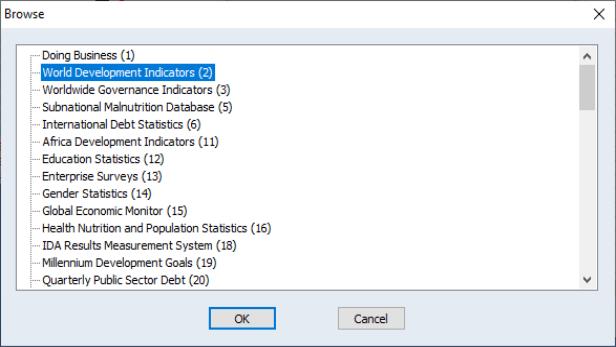
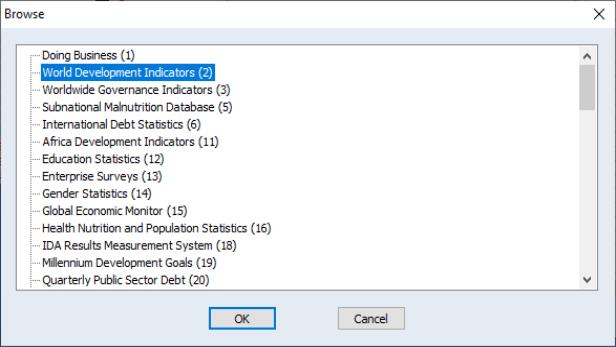
The default selected is (a collection of development indicators that includes global development data). Click on to view and select another data source.
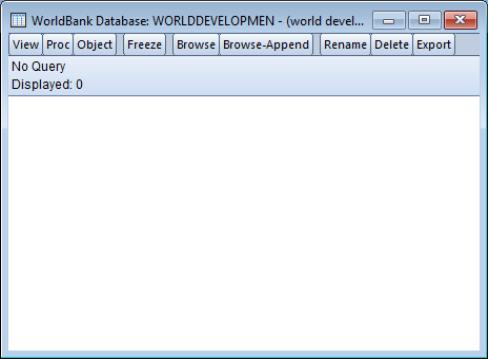
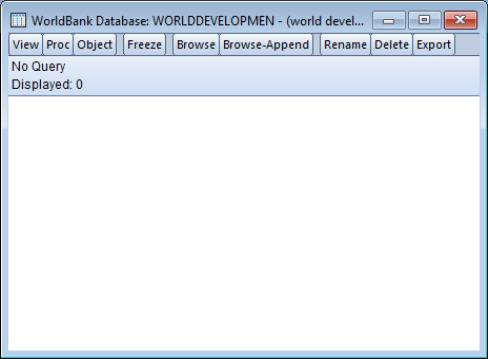
Click on to open the online database. You will be presented with a standard EViews database window.
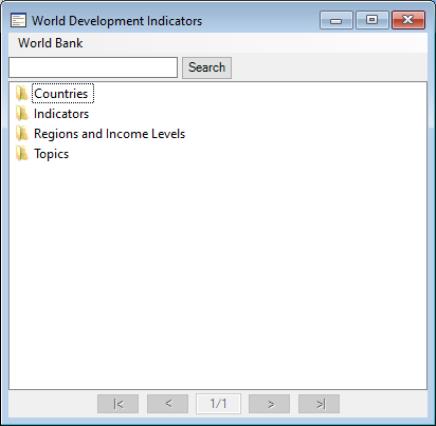
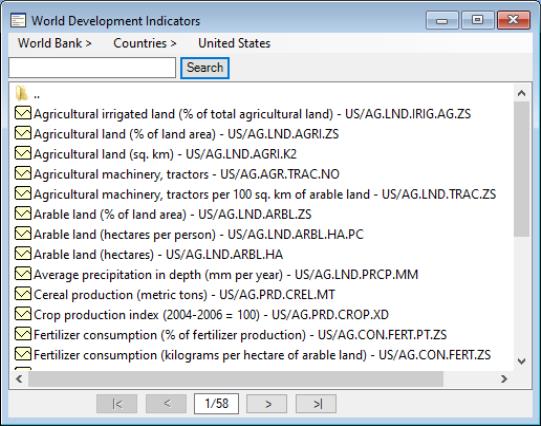
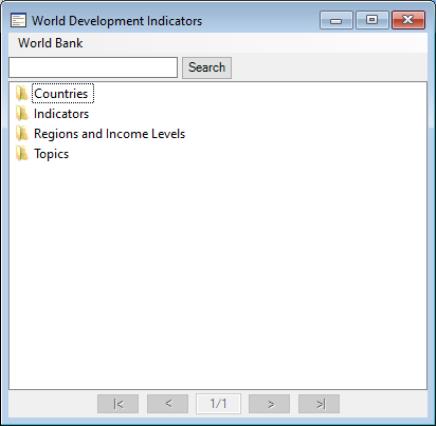
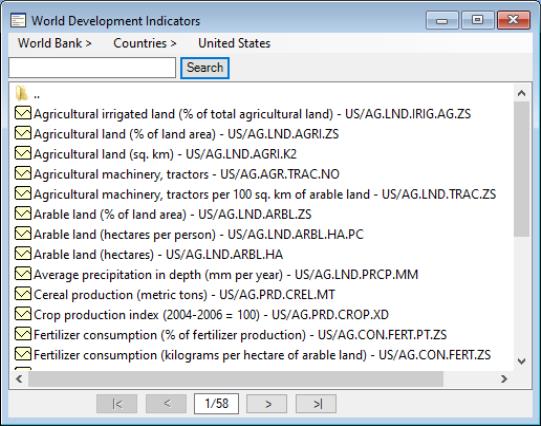
The database window represents a connection to the data. Click on or , which opens a new custom World Bank database. Click on the folder icons to move down into subtopics:
The browser allows you to find data available within the World Bank by navigating through a set of nested folders. Simply click on any folder to move inside it.
The full path of the active folder will be shown in the header at the top of the window. You can click on any folder within the path to navigate back to that folder. Here, clicking on Countries will move back up a single level to show the country choices. Similarly, clicking on the ".." in the window listing will move up a single level.
The browser interface to the World Bank offers a number of useful tools for working with your World Bank database:
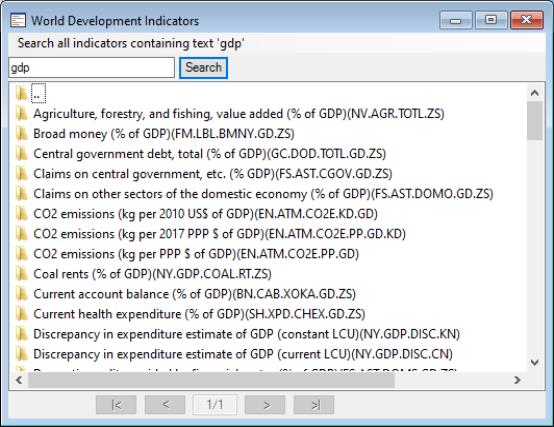
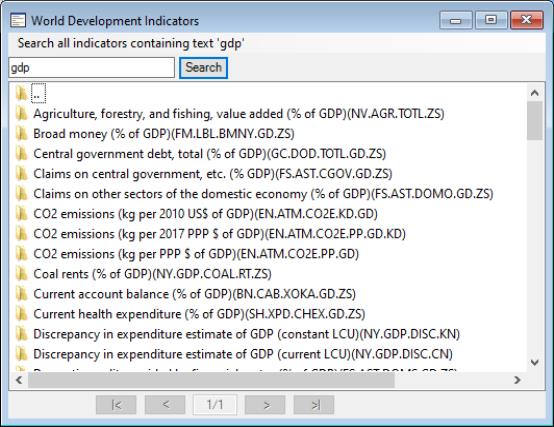
• The button allows searching by keyword. Simply enter a keyword into the edit box and click the button. EViews will display a list of indicators that match the keyword.
• You can use the < and > buttons to navigate to the next and the previous indicator pages.
• You can use the |< and >| buttons to navigate to the first or last indicator pages.
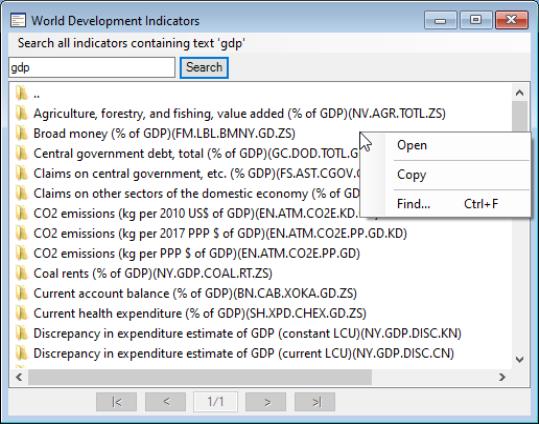
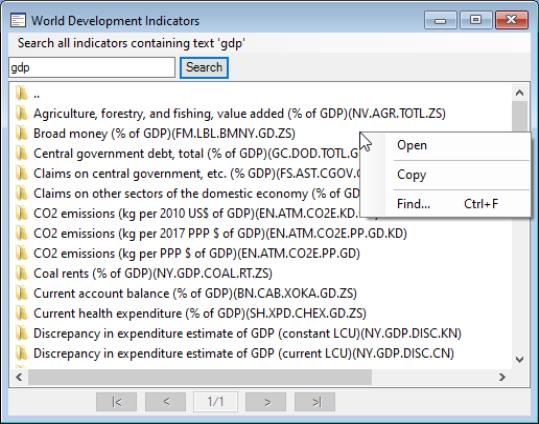
• Right-clicking on items in the browser will bring up a menu with items for performing useful tasks:
1. Right-click can be used to navigate inside a folder or bring an indicator in the database window.
2. Right-click can be used to select an indicator to be copied to a workfile
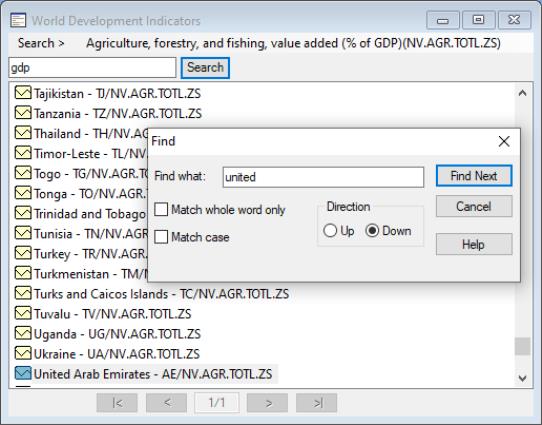
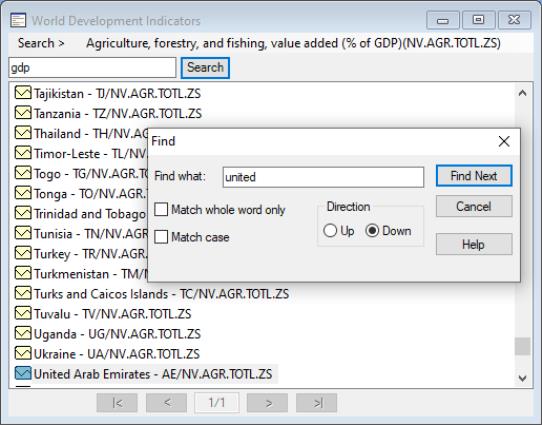
3. Right-click allows you to do a keyword search.
Once you have found the series of interest, you may drag-and-drop (or copy-and-paste) the series directly into an EViews workfile in the usual fashion.
World Health Organization
World Health Organization (WHO) provides access to a large range of health-related data and statistics. An internet connection is required to obtain WHO online data.
The WHO database interface is not available in EViews Standard Edition.
For more information on data subscriptions, please see:
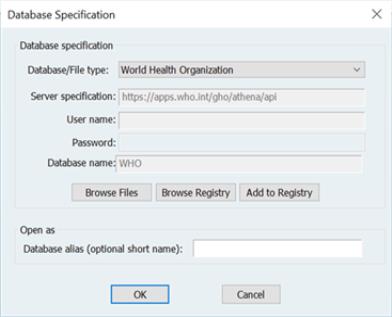
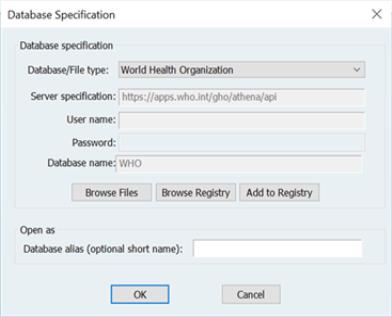
EViews offers a custom interface to World Health Organization data. To open the database, select from the main EViews menu and select from the dropdown menu:
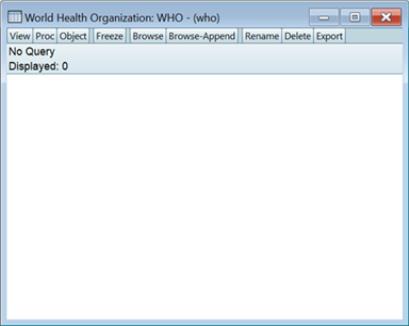
Click to open the standard EViews database window:
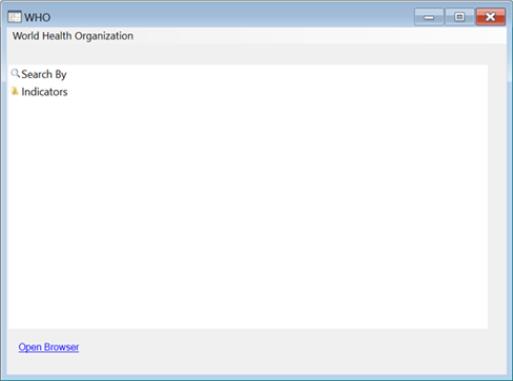
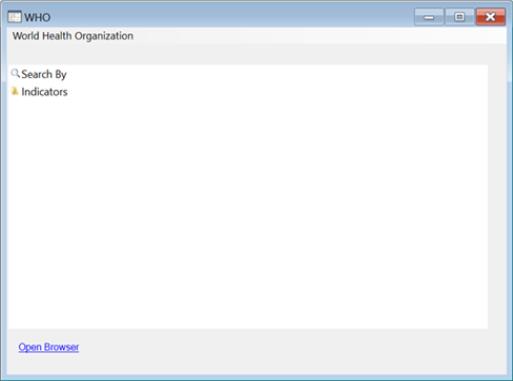
Click on in the toolbar to open the custom WHO window:
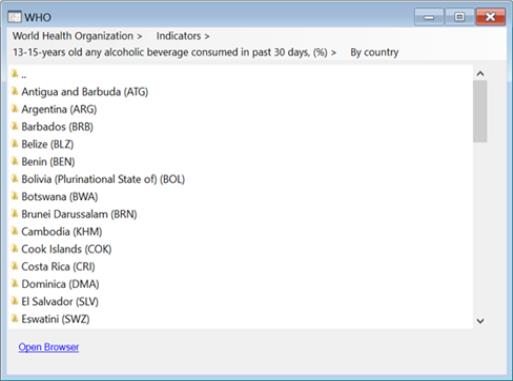
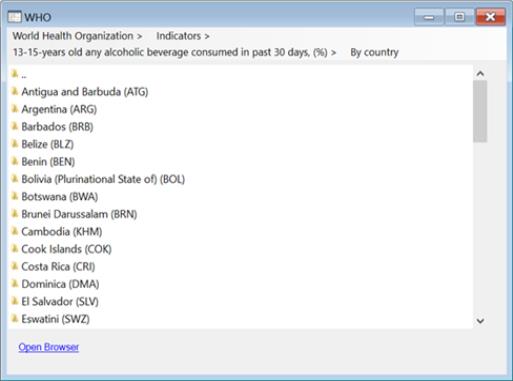
Click on the folder and navigate through the set of nested folders:
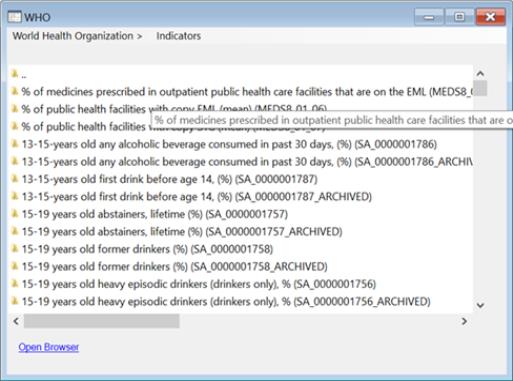
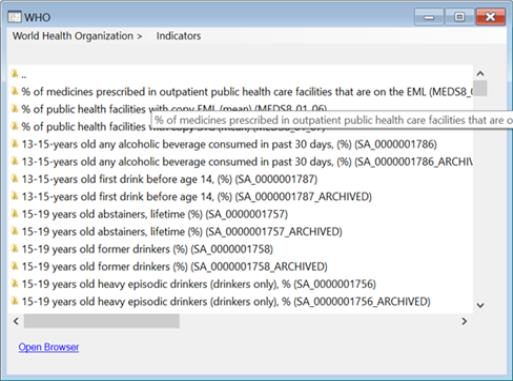
Click on a folder to open its subtopics:
The full path of the active folder is shown in the header. Click on any folder within the path to return to it. For example, clicking on will move up a single level to show the country choices. Similarly, clicking on “..” in the window listing will move up a single level.
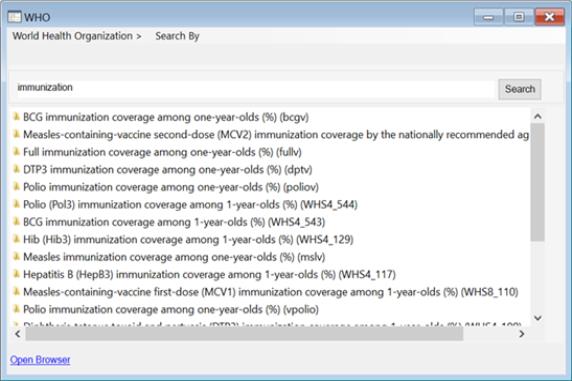
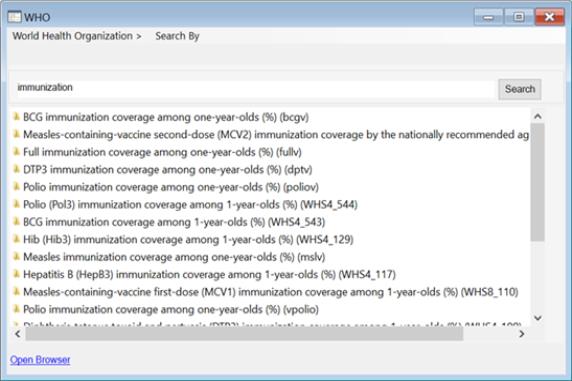
Alternately, click on to search for a keyword:
Once the series of interest is selected, drag or copy it into a workfile. For more information, click the link at the bottom of the dialog to open the WHO website.
